Lincoln Corsair: Body Closures / Removal and Installation - Rear Door
Lincoln Corsair 2020-2026 Service Manual / Body and Paint / Body and Paint / Body Closures / Removal and Installation - Rear Door
Special Tool(s) / General Equipment
| Door Lift |
Removal
NOTE: Removal steps in this procedure may contain installation details.
NOTE: LH shown, RH similar.
-
Open the door.
.jpg) |
-
Remove the check arm bolt.
Torque: 18 lb.ft (25 Nm)
.jpg) |
-
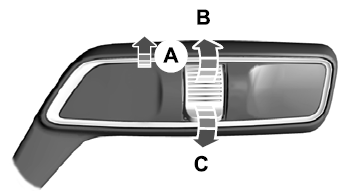
Disconnect the rear door electrical connector.
.jpg) |
-
-
Remove the bolt.
Use the General Equipment: Door Lift
Torque: 22 lb.ft (30 Nm)
-
Remove the bolt.
Torque: 35 lb.ft (48 Nm)
-
Remove the bolt.
.jpg) |
-
Remove the door.
.jpg) |
Installation
-
To install, reverse the removal procedure.
-
NOTE: This step is only necessary when installing a new component.
Check the alignment and correct if necessary.
Refer to: Rear Door Alignment (501-03 Body Closures, General Procedures).
 Removal and Installation - Power Liftgate Motor
Removal
NOTE:
Removal steps in this procedure may contain installation details.
NOTE:
LH side shown, RH side similar.
On both sides...
 Removal and Installation - Rear Door Check Arm
Removal
NOTE:
Removal steps in this procedure may contain installation details.
NOTE:
LH shown, RH similar.
Open the door.
Remove the check arm bolt...
Other information:
Lincoln Corsair 2020-2026 Service Manual: Removal and Installation - Degas Bottle
Special Tool(s) / General Equipment Fluid Suction Gun Hose Clamp Remover/Installer Locking Pliers Removal WARNING: Always allow the engine to cool before opening the cooling system. Do not unscrew the coolant pressure relief cap when the engine is operating or the cooling system is hot...
Lincoln Corsair 2020-2026 Owners Manual: What Is Reverse Braking Assist. Reverse Braking Assist Precautions
What Is Reverse Braking Assist The system is designed to reduce impact damage or avoid a collision completely by using the sensors on the rear of your vehicle. The system functions when in reverse (R) and traveling at a speed of 1–7 mph (1.5–12 km/h)...
Categories
- Manuals Home
- 1st Generation Lincoln Corsair Owners Manual
- 1st Generation Lincoln Corsair Service Manual
- Technical Specifications
- Auto-Start-Stop
- Refueling - Gasoline
- New on site
- Most important about car
Autowipers (IF EQUIPPED)
Wet or winter driving conditions with ice, snow or salty road mist can cause inconsistent and unexpected wiping or smearing.
Copyright © 2026 www.licorsair.com