Lincoln Corsair: Body Closures / Removal and Installation - Rear Door Check Arm
Lincoln Corsair 2020-2024 Service Manual / Body and Paint / Body and Paint / Body Closures / Removal and Installation - Rear Door Check Arm
Removal
NOTE: Removal steps in this procedure may contain installation details.
NOTE: LH shown, RH similar.
-
Open the door.
.jpg) |
-
Remove the check arm bolt.
Torque: 18 lb.ft (25 Nm)
.jpg) |
-
Remove the rear door trim panel.
Refer to: Rear Door Trim Panel (501-05 Interior Trim and Ornamentation, Removal and Installation).
-
Remove the rear door speaker.
Refer to: Rear Door Speaker (415-00 Information and Entertainment System - General Information, Removal and Installation).
-
Remove the rear door check arm cover.
.jpg) |
-
Remove the rear door check arm nuts.
Torque: 80 lb.in (9 Nm)
.jpg) |
-
Remove the rear door check arm.
.jpg) |
Installation
- To install, reverse the removal procedure.
 Removal and Installation - Rear Door
Special Tool(s) /
General Equipment
Door Lift
Removal
NOTE:
Removal steps in this procedure may contain installation details.
NOTE:
LH shown, RH similar...
 Removal and Installation - Rear Gate Trunk Module (RGTM)
Removal
NOTE:
Removal steps in this procedure may contain installation details.
NOTE:
This step is only necessary when installing a new component...
Other information:
Lincoln Corsair 2020-2024 Owners Manual: Adaptive Cruise Control Limitations
Vehicles With: Adaptive Cruise Control With Lane Centering Adaptive cruise control limitations apply to lane centering unless stated otherwise or contradicted by a lane centering limitation. The system may not correctly operate in any of the following conditions: Your vehicle is not centered in the lane...
Lincoln Corsair 2020-2024 Service Manual: Removal and Installation - Driver Door Window Control Switch
Special Tool(s) / General Equipment Interior Trim Remover Removal Remove the driver door window control switch and bezel as an assembly. Release the clips. Use the General Equipment: Interior Trim Remover Disconnect the driver door window control switch electrical connector...
Categories
- Manuals Home
- 1st Generation Lincoln Corsair Owners Manual
- 1st Generation Lincoln Corsair Service Manual
- Keyless Entry Settings
- Programming the Garage Door Opener to Your Garage Door Opener Motor
- Child Safety Locks
- New on site
- Most important about car
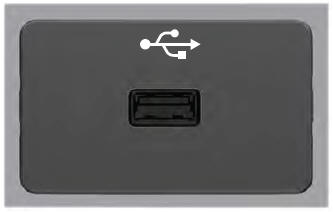
USB Port
WARNING: Driving while distracted can result in loss of vehicle control, crash and injury. We strongly recommend that you use extreme caution when using any device that may take your focus off the road. Your primary responsibility is the safe operation of your vehicle. We recommend against the use of any hand-held device while driving and encourage the use of voice-operated systems when possible. Make sure you are aware of all applicable local laws that may affect the use of electronic devices while driving.
USB A
Copyright © 2024 www.licorsair.com