Lincoln Corsair: Front Disc Brake / Removal and Installation - Brake Disc
Lincoln Corsair 2020-2026 Service Manual / Chassis / Brake System / Front Disc Brake / Removal and Installation - Brake Disc
Materials
| Name | Specification |
|---|---|
| Motorcraft® Metal Brake Parts Cleaner PM-4-A, PM-4-B, APM-4-C |
- |
Removal
 WARNING:
Service actions on vehicles equipped with electronic brake
booster and electronic parking brakes may cause unexpected brake
application, which could result in injury to hands or fingers. Put the
brake system into service mode prior to servicing or removing any brake
components. Failure to follow this instruction may result in serious
personal injury.
WARNING:
Service actions on vehicles equipped with electronic brake
booster and electronic parking brakes may cause unexpected brake
application, which could result in injury to hands or fingers. Put the
brake system into service mode prior to servicing or removing any brake
components. Failure to follow this instruction may result in serious
personal injury.
NOTE: Removal steps in this procedure may contain installation details.
-
Activate the brake service mode.
Refer to: Brake Service Mode Activation and Deactivation (206-00 Brake System - General Information, General Procedures).
-
Remove the wheel and tire.
Refer to: Wheel and Tire (204-04A Wheels and Tires, Removal and Installation).
-
NOTICE: Make sure that no load is placed on the brake hose.
Remove the bolts and position the brake caliper and anchor plate aside.
Torque: 81 lb.ft (110 Nm)
 |
-
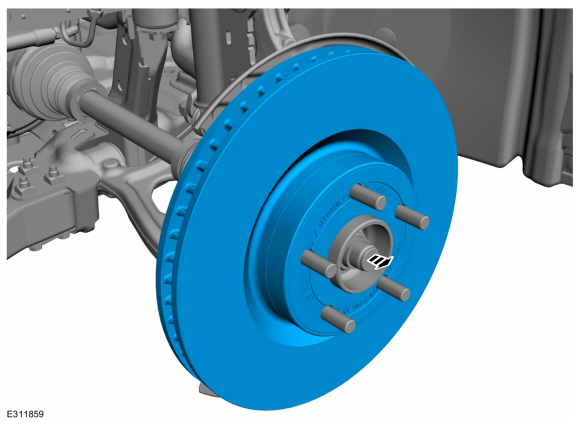
Remove the brake disc.
 |
Installation
-
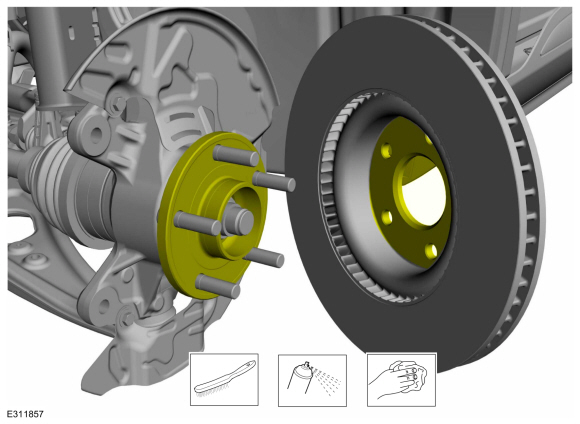
Clean the brake disc mating surfaces using a wire brush and the specified material.
Material: Motorcraft® Metal Brake Parts Cleaner / PM-4-A, PM-4-B, APM-4-C
 |
-
To install, reverse the removal procedure.
-
Deactivate the brake service mode.
Refer to: Brake Service Mode Activation and Deactivation (206-00 Brake System - General Information, General Procedures).
-
Apply the brake pedal several times to verify correct brake system operation.
 Removal and Installation - Brake Caliper Anchor Plate
Removal
WARNING:
Service actions on vehicles equipped with electronic brake
booster and electronic parking brakes may cause unexpected brake
application, which could result in injury to hands or fingers...
 Removal and Installation - Brake Disc Shield
Removal
NOTE:
Removal steps in this procedure may contain installation details.
Remove the brake disc.
Refer to: Brake Disc (206-03 Front Disc Brake, Removal and Installation)...
Other information:
Lincoln Corsair 2020-2026 Service Manual: Removal and Installation - Throttle Body
Removal Remove the charge air cooler (CAC) outlet pipe. Refer to: Charge Air Cooler (CAC) Outlet Pipe (303-12A Intake Air Distribution and Filtering - 2.0L EcoBoost (177kW/240PS) – MI4, Removal and Installation). Refer to: Charge Air Cooler (CAC) Outlet Pipe (303-12B Intake Air Distribution and Filtering - 2...
Lincoln Corsair 2020-2026 Owners Manual: What Is Drive Mode Control
The system delivers a driving experience through a suite of sophisticated electronic vehicle systems. These systems optimize steering, handling and powertrain response. This provides a single location to control multiple systems performance settings...
Categories
- Manuals Home
- 1st Generation Lincoln Corsair Owners Manual
- 1st Generation Lincoln Corsair Service Manual
- Programming the Garage Door Opener to Your Garage Door Opener Motor
- Auto Hold (IF EQUIPPED)
- Head Up Display
- New on site
- Most important about car
360 Degree Camera Cameras
Locating the Rear View Camera

The rear view camera is on the tailgate.
Locating the Front View Camera
Copyright © 2026 www.licorsair.com