Lincoln Corsair: Exterior Trim and Ornamentation / Removal and Installation - Rear Door Upper Moulding
Lincoln Corsair 2020-2024 Service Manual / Body and Paint / Body and Paint / Exterior Trim and Ornamentation / Removal and Installation - Rear Door Upper Moulding
Removal
NOTE: Removal steps in this procedure may contain installation details.
NOTE: LH side shown, RH side similar.
-
Remove the upper belt moulding screw at front of the door.
Torque: 10 lb.in (1.1 Nm)
.jpg) |
-
Remove the upper belt moulding screw at rear of the door.
Torque: 10 lb.in (1.1 Nm)
.jpg) |
-
Lift the moulding at the front edge using a non-marring
trim tool and slide forward to disengage from the tab at the rear and
remove the moulding.
.jpg) |
-
Pull the rear door glass runner.
.jpg) |
-
Remove the screw.
Torque: 10 lb.in (1.1 Nm)
.jpg) |
-
-
Remove the retainer clips and dislodge the 4 way clip.
-
Remove the rear door upper moulding.
-
Remove the retainer clips and dislodge the 4 way clip.
.jpg) |
-
Pull the rear door glass runner.
.jpg) |
-
Remove the screw.
Torque: 10 lb.in (1.1 Nm)
.jpg) |
-
-
Remove the retainer clips and dislodge the 4 way clip.
-
Remove the rear door upper moulding.
-
Remove the retainer clips and dislodge the 4 way clip.
.jpg) |
Installation
-
To install, reverse the removal procedure.
 Removal and Installation - Rear Door Moulding
Removal
NOTE:
Removal steps in this procedure may contain installation details.
NOTE:
LH side door shown, RH side door similar.
NOTE:
Do not use excessive force when removing retainers, to avoid damage to moulding...
 Removal and Installation - Rear Quarter Panel Moulding
Special Tool(s) /
General Equipment
Interior Trim Remover
Removal
NOTE:
Removal steps in this procedure may contain installation details...
Other information:
Lincoln Corsair 2020-2024 Service Manual: Removal and Installation - Downshift Paddle Switch
Removal NOTE: Removal steps in this procedure may contain installation details. Remove the driver airbag. Refer to: Driver Airbag (501-20B Supplemental Restraint System, Removal and Installation). Remove the downshift paddle switch...
Lincoln Corsair 2020-2024 Service Manual: Removal and Installation - Front Door Window Glass
Special Tool(s) / General Equipment Punch Removal NOTE: LH (left-hand) side shown, RH (right-hand) side similar. Remove the front door trim panel. Refer to: Front Door Trim Panel (501-05 Interior Trim and Ornamentation, Removal and Installation)...
Categories
- Manuals Home
- 1st Generation Lincoln Corsair Owners Manual
- 1st Generation Lincoln Corsair Service Manual
- Programming the Garage Door Opener to Your Hand-Held Transmitter
- Remote Start Settings
- Interior Lamps
- New on site
- Most important about car
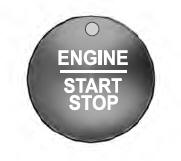
Keyless Starting
Note: The keyless starting system may not function if the key is close to metal objects or electronic devices such as cellular phones.
Note: A valid key must be located inside your vehicle to switch the ignition on and start the engine.
Ignition Modes

Copyright © 2024 www.licorsair.com
