
Lincoln Corsair: Glass, Frames and Mechanisms / Removal and Installation - Driver Door Window Control Switch
Lincoln Corsair 2020-2024 Service Manual / Body and Paint / Body and Paint / Glass, Frames and Mechanisms / Removal and Installation - Driver Door Window Control Switch
Special Tool(s) / General Equipment
| Interior Trim Remover |
Removal
-
Remove the driver door window control switch and bezel as an assembly.
-
Release the clips.
Use the General Equipment: Interior Trim Remover
-
Disconnect the driver door window control switch electrical connector.
-
Disconnect the door lock control switch electrical
connector and remove the driver door window control switch and bezel as
an assembly.
-
Release the clips.
.jpg) |
-
NOTE: This step is only necessary when installing a new component.
Remove the driver door window control switch.
-
Remove the screws from driver door window control switch.
-
Remove the driver door window control switch from the bezel assembly.
-
Remove the screws from driver door window control switch.
.jpg) |
Installation
-
To install, reverse the removal procedure.
 General Procedures - Power Door Window Initialization
Initialization
WARNING:
Before beginning any service procedure in this
section, refer to Safety Warnings in section 100-00 General Information...
 Removal and Installation - Front Door Glass Run and Bracket
Removal
NOTE:
LH (left-hand) side shown, RH (right-hand) side similar.
Remove the exterior front door handle reinforcement.
Refer to: Exterior Front Door Handle Reinforcement (501-14 Handles,
Locks, Latches and Entry Systems, Removal and Installation)...
Other information:
Lincoln Corsair 2020-2024 Owners Manual: What is the Rear Occupant Alert System. How Does the Rear Occupant Alert System Work. Rear Occupant Alert System Precautions
What is the Rear Occupant Alert System The rear occupant alert system monitors vehicle conditions and notifies you to check for rear seat occupants when you switch the ignition off. How Does the Rear Occupant Alert System Work The system monitors when rear doors have been opened and closed to indicate the potential presence of an occupant in the rear seat...
Lincoln Corsair 2020-2024 Service Manual: Specifications
Lubricants, Fluids, Sealers and Adhesives Specifications DOT 4 LV brake fluid Material: Motorcraft® DOT 4 LV High Performance Motor Vehicle Brake Fluid / PM-20 (WSS-M6C65-A2) Torque Specifications Item Nm lb-ft lb-in Front caliper bleeder scre..
Categories
- Manuals Home
- 1st Generation Lincoln Corsair Owners Manual
- 1st Generation Lincoln Corsair Service Manual
- Automatic Transmission - 8-Speed Automatic Transmission – 8F35/8F40
- Changing a Road Wheel
- Memory Function
- New on site
- Most important about car
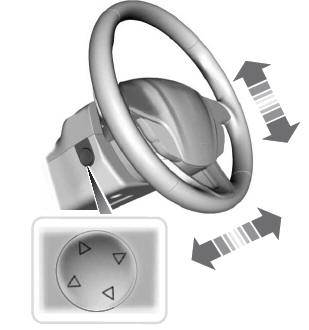
Adjusting the Steering Wheel - Vehicles With: Power Adjustable Steering Column
WARNING: Do not adjust the steering wheel when your vehicle is moving.
Note: Make sure that you are sitting in the correct position.

Copyright © 2024 www.licorsair.com