Lincoln Corsair: Body Closures / Removal and Installation - Front Door
Lincoln Corsair 2020-2026 Service Manual / Body and Paint / Body and Paint / Body Closures / Removal and Installation - Front Door
Special Tool(s) / General Equipment
| Door Lift |
Removal
NOTE: Removal steps in this procedure may contain installation details.
NOTE: LH shown, RH similar.
-
Open the door.
.jpg) |
-
Remove the check arm bolt.
Torque: 18 lb.ft (25 Nm)
.jpg) |
-
Disconnect the door electrical connector.
.jpg) |
-
Remove the bolts.
Use the General Equipment: Door Lift
Torque: 22 lb.ft (30 Nm)
.jpg) |
-
Remove the door.
.jpg) |
Installation
-
To install, reverse the removal procedure.
-
NOTE: This step is only necessary when installing a new component.
Check the alignment and correct if necessary.
Refer to: Front Door Alignment (501-03 Body Closures, General Procedures).
 General Procedures - Rear Door Alignment
Inspection
NOTE:
Removal steps in this procedure may contain installation details.
NOTE:
LH shown, RH similar.
Inspect the body-to-rear door dimensions...
 Removal and Installation - Front Door Check Arm
Removal
NOTE:
Removal steps in this procedure may contain installation details.
NOTE:
LH shown, RH similar.
Open the door.
Remove the check arm bolt...
Other information:
Lincoln Corsair 2020-2026 Service Manual: Removal and Installation - Transmission Range (TR) Sensor
Special Tool(s) / General Equipment Punch Removal Remove the main control valve body. Refer to: Main Control Valve Body (307-01A Automatic Transmission - 8-Speed Automatic Transmission – 8F35/8F40, Removal and Installation). Disconnect the manual park release cable from the manual control lever...
Lincoln Corsair 2020-2026 Service Manual: Description and Operation - Rear Drive Axle and Differential - Overview
The RDU is available with 2.58 drive ratio. Rear Drive Axle and Differential The rear drive axle and differential unit (RDU ) is a cast aluminum differential assembly located in the rear of the vehicle consisting of the following components: Crown wheel and pinion An electrically activated and mechanically engaged clutch pack acting on the rear drive axles, that applies or removes..
Categories
- Manuals Home
- 1st Generation Lincoln Corsair Owners Manual
- 1st Generation Lincoln Corsair Service Manual
- Head Up Display
- Overhaul - Main Control Valve Body
- Automatic Transmission - 8-Speed Automatic Transmission – 8F35/8F40
- New on site
- Most important about car
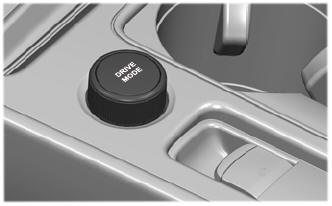
Selecting a Drive Mode. DRIVE MODES
Selecting a Drive Mode
Note: Drive mode changes may not be available when the ignition is off.
Copyright © 2026 www.licorsair.com