Lincoln Corsair: Automatic Transmission - Automatic Transmission – HF45 / Removal and Installation - Transmission Support Insulator
Special Tool(s) /
General Equipment
| Trolley Jack |
| Wooden Block |
Removal
-
Drain the Electric Powertrain Cooling System.
Refer to: Cooling System Filling and Bleeding (303-03D Electric
Powertrain Cooling - 2.5L Duratec – Hybrid (121kW/164PS) (BG), General
Procedures).
-
Disable the vehicle high-voltage electrical system.
Refer to: High Voltage System De-energizing (414-03A High Voltage Battery, Mounting and Cables, General Procedures).
-
Remove the air cleaner outlet pipe.
Refer to: Air Cleaner Outlet Pipe (303-12C Intake Air Distribution and
Filtering - 2.5L Duratec – Hybrid (121kW/164PS) (BG), Removal and
Installation).
-
Remove the air cleaner.
Refer to: Air Cleaner (303-12C Intake Air Distribution and Filtering -
2.5L Duratec – Hybrid (121kW/164PS) (BG), Removal and Installation).
-
NOTE:
Be prepared to catch a minimal amount of escaping coolant fluid.
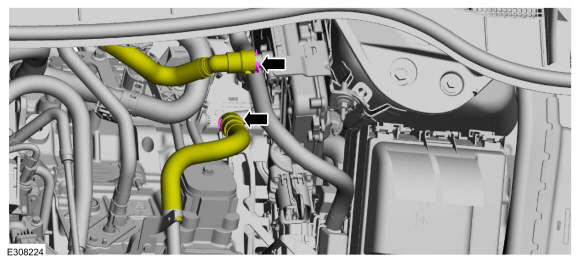
Disconnect the coolant hoses.
-
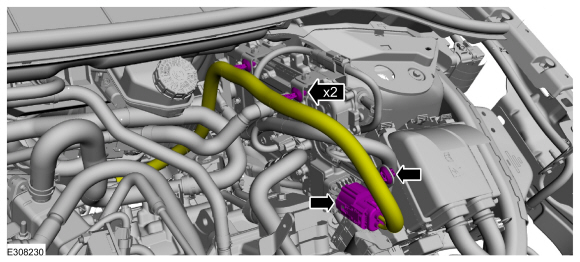
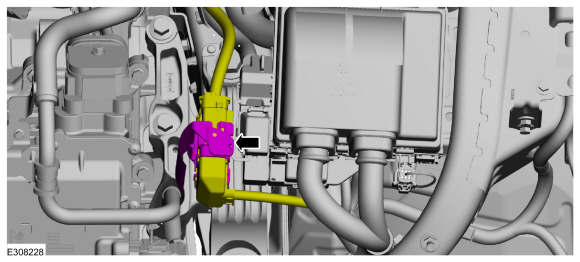
Disconnect the electrical connector and wiring harness retainers.
-
Disconnect the electrical connectors and wiring harness retainers.
-
Disconnect the electrical connector.
-
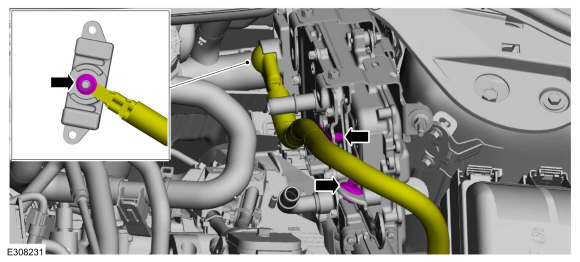
Remove wiring harness nut and disconnect the wiring harness retainers.
-
NOTICE:
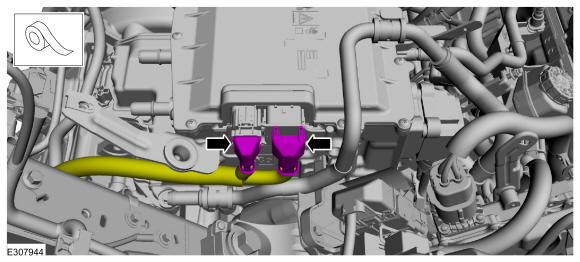
Place tape over the connectors on the ISC to prevent contaminating the connector pins.
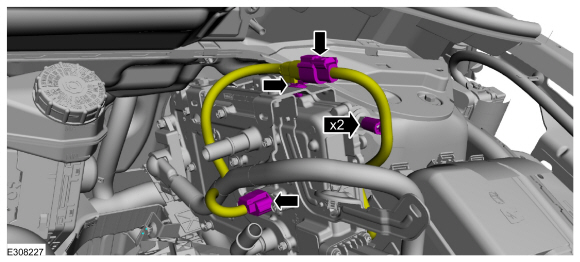
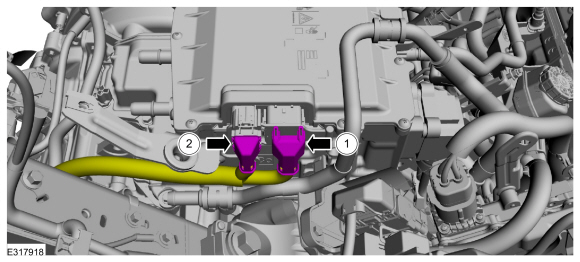
Disconnect the ISC (Inverter System Controller) electrical connectors.
-
NOTICE:
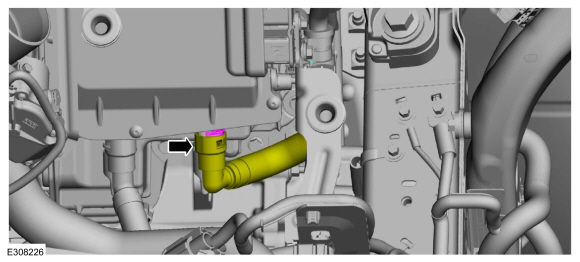
Place absorbent towels under the coolant connections to prevent coolant from contacting the ISC.
Disconnect the coolant hose.
-
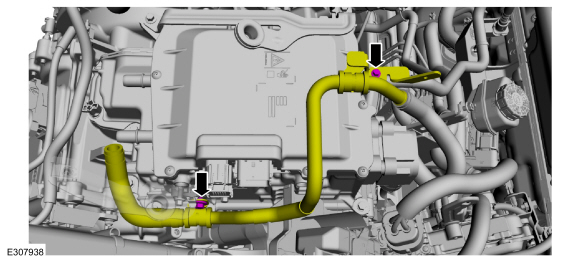
Remove the bolts and position aside the coolant tube.
-
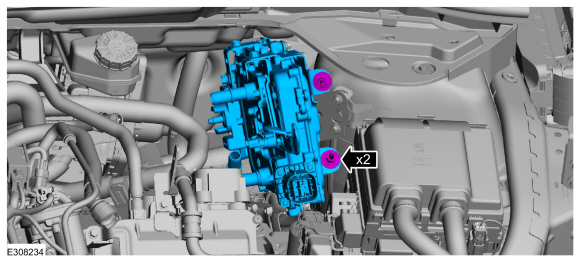
Remove the bolts and the power converter.
-
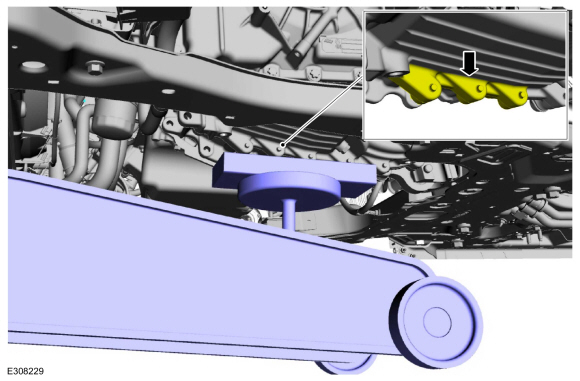
Position the jack and wooden block under the transmission case outer edge to support the transmission.
Use the General Equipment: Trolley Jack
Use the General Equipment: Wooden Block
-
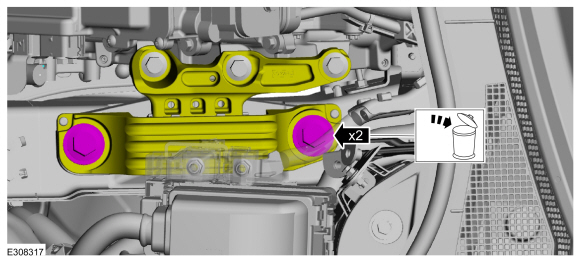
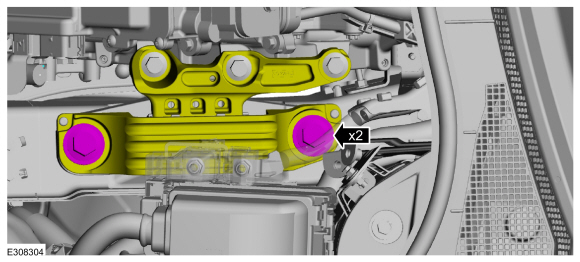
Remove and discard the transmission support insulator to frame rail bolts.
-
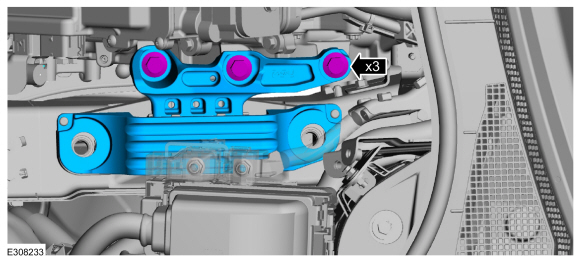
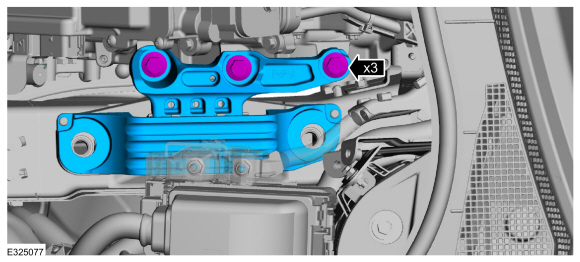
Remove the transmission support insulator to transmission bolts. Remove the transmission support insulator.
Installation
-
NOTE:
May need to raise the transmission to seat the
support insulator bosses on the transmission. The frame rail side of the
support insulator should be raised slightly above the frame rail holes
to neutralize the insulator.
Install the transmission support insulator and bolts finger tight.
-
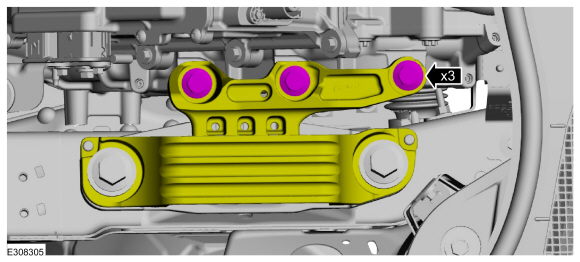
Install new transmission support insulator to frame rail bolts finger tight.
-
Tighten the transmission support insulator to frame rail bolts.
Torque:
92 lb.ft (125 Nm)
-
NOTE:
Lower the transmission to seat the transmission support insulator to the frame rail.
Tighten the transmission support insulator to frame rail bolts.
Torque:
184 lb.ft (250 Nm)
-
Install the power converter and the bolts.
Torque:
159 lb.in (18 Nm)
-
NOTICE:
Be careful not to get residual coolant in the open ISC connectors.
Position back the coolant tube and install the bolts.
Torque:
71 lb.in (8 Nm)
-
NOTE:
When connecting the coolant tube, push-click-pull on the coolant tube to ensure proper connection.
Connect the coolant hose.
-
-
Connect C199A (40 pin connector) and engage the lever lock.
-
Connect C199B (22 pin connector).
-
Connect the converter wiring harness retainers and install the wiring harness nut.
Torque:
53 lb.in (6 Nm)
-
Connect the electrical connector.
-
Connect the electrical connectors and wiring harness retainers.
-
Connect the electrical connector and wiring harness retainers.
-
Connect the coolant hoses.
-
Install the air cleaner outlet pipe.
Refer to: Air Cleaner Outlet Pipe (303-12C Intake Air Distribution and
Filtering - 2.5L Duratec – Hybrid (121kW/164PS) (BG), Removal and
Installation).
-
Install the air cleaner.
Refer to: Air Cleaner (303-12C Intake Air Distribution and Filtering -
2.5L Duratec – Hybrid (121kW/164PS) (BG), Removal and Installation).
-
Connect the vehicle high-voltage electrical system.
Refer to: High Voltage System De-energizing (414-03A High Voltage Battery, Mounting and Cables, General Procedures).
-
Fill and bleed the Electric Powertrain Cooling System.
Refer to: Cooling System Filling and Bleeding (303-03D Electric
Powertrain Cooling - 2.5L Duratec – Hybrid (121kW/164PS) (BG), General
Procedures).
Materials
Name
Specification
Motorcraft® MERCON® ULV Automatic Transmission FluidXT-12-QULV
WSS-M2C949-A, MERCON® ULV
Removal
With the vehicle in NEUTRAL, position it on a hoist...
NOTE:
The transmission cannot be removed from the vehicle separate
from the engine. Separate the transmission from the engine following the
additional steps in the transmission procedure...
Other information:
Special Tool(s) /
General Equipment
Side Cutter Pliers
Hose Clamp Remover/Installer
Materials
Name
Specification
Motorcraft® Silicone Brake Caliper Grease and Dielectric CompoundXG-3-A
ESA-M1C200-AESE-M1C171-A
Removal
NOTICE:
The turbocharger compressor vanes can be damaged by even the
smallest particles...
Removal
NOTE:
Removal steps in this procedure may contain installation details.
Remove the air cleaner outlet pipe.
Refer to: Air Cleaner Outlet Pipe (303-12A Intake Air Distribution and
Filtering - 2.0L EcoBoost (177kW/240PS) – MI4, Removal and
Installation)...
Categories
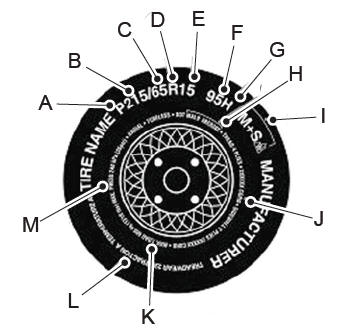
P215/65R15 95H is an example of a tire
size, load index and speed rating. The
definitions of these items are listed
below. (Note that the tire size, load index
and speed rating for your vehicle may
be different from this example.)
P: Indicates a tire, designated by the
Tire and Rim Association, that may be
used for service on cars, sport utility
vehicles, minivans and light trucks. Note:
If your tire size does not begin with a
letter this may mean it is designated by
either the European Tire and Rim
Technical Organization or the Japan Tire
Manufacturing Association.
215: Indicates the nominal width of
the tire in millimeters from sidewall edge
to sidewall edge. In general, the larger
the number, the wider the tire.
65: Indicates the aspect ratio which
gives the tire's ratio of height to width.
R: Indicates a radial type tire.
15: Indicates the wheel or rim
diameter in inches. If you change your
wheel size, you will have to purchase
new tires to match the new wheel
diameter.
95: Indicates the tire's load index. It
is an index that relates to how much
weight a tire can carry. You may find this
information in your owner’s manual. If
not, contact a local tire dealer.
read more




 Removal and Installation - Transmission Fluid Auxiliary Pump
 Removal - Transmission
