Lincoln Corsair: Interior Trim and Ornamentation / Removal and Installation - Front Scuff Plate Trim Panel
Lincoln Corsair 2020-2025 Service Manual / Body and Paint / Body and Paint / Interior Trim and Ornamentation / Removal and Installation - Front Scuff Plate Trim Panel
Special Tool(s) / General Equipment
| Interior Trim Remover |
Removal
NOTE: LH (left hand) shown, RH (right hand) similar.
-
Release the clips and remove the instrument panel side trim panel.
Use the General Equipment: Interior Trim Remover
.jpg) |
Left hand side
-
Position the steering column trim panel downward.
-
Release the steering column trim panel clips.
Use the General Equipment: Interior Trim Remover
-
Disconnect the headlamp control switch electrical connector.
-
Release the steering column trim panel clips.
.jpg) |
-
Remove the hood latch release handle.
Refer to: Hood Latch Release Handle (501-14 Handles, Locks, Latches and Entry Systems, Removal and Installation).
Right hand side
-
Release the clips and remove the instrument panel lower trim panel.
Use the General Equipment: Interior Trim Remover
.jpg) |
All vehicles
-
Release the clips and remove the instrument panel upper side trim panel.
Use the General Equipment: Interior Trim Remover
.jpg) |
-
Remove the cowl side trim panel.
-
Release the cowl side trim panel lower clips.
Use the General Equipment: Interior Trim Remover
-
Pull downward and outward on the cowl side trim panel to release the upper tab.
-
Release the cowl side trim panel lower clips.
.jpg) |
-
Remove the front scuff plate trim panel.
-
Release the clips.
Use the General Equipment: Interior Trim Remover
-
If equipped.
Disconnected the front scuff plate trim panel electrical connector.
-
Release the clips.
.jpg) |
Installation
-
To install, reverse the removal procedure.
-
Inspect and position the front door weather strip lip so
that it overlaps the top of the front scuff plate and cowl side trim
panels.
.jpg) |
 Removal and Installation - Front Door Trim Panel
Special Tool(s) /
General Equipment
Pick Hook
Interior Trim Remover
Removal
NOTE:
LH (left hand) shown, RH (right hand) similar.
NOTE:
Removal steps in this procedure may contain installation details...
 Removal and Installation - Headliner
Special Tool(s) /
General Equipment
Pick Hook
Interior Trim Remover
Materials
Name
Specification
3M™ Super-Fast Repair Adhesive04747
-
Removal
Remove the following items:
On both sides...
Other information:
Lincoln Corsair 2020-2025 Owners Manual: Export Unique Options
For your particular global region, your vehicle may be equipped with features and options that are different from the features and options that are described in this Owner’s Manual. A market unique supplement may be supplied that complements this book...
Lincoln Corsair 2020-2025 Service Manual: Removal and Installation - Intake Air Temperature (IAT) Sensor
Removal NOTE: Removal steps in this procedure may contain installation details. Disconnect the IAT electrical connector. Remove the IAT sensor. Installation To install, reverse the removal procedure...
Categories
- Manuals Home
- 1st Generation Lincoln Corsair Owners Manual
- 1st Generation Lincoln Corsair Service Manual
- Interior Lamps
- Overhaul - Main Control Valve Body
- Warning Lamps and Indicators
- New on site
- Most important about car
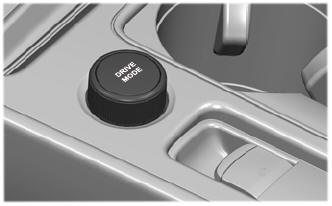
Selecting a Drive Mode. DRIVE MODES
Selecting a Drive Mode
Note: Drive mode changes may not be available when the ignition is off.
Copyright © 2025 www.licorsair.com