Lincoln Corsair: Power Transfer Unit - 2.0L EcoBoost (177kW/240PS) – MI4 / Removal - Power Transfer Unit - Vehicles Without: Power Transfer Unit Oil-to-Coolant Cooler
Special Tool(s) /
General Equipment
-
Remove the front subframe.
Refer to: Front Subframe (502-00 Uni-Body, Subframe and Mounting System, Removal and Installation).
-
Remove the catalytic converter.
Refer to: Catalytic Converter (309-00A Exhaust System - 2.0L EcoBoost (177kW/240PS) – MI4, Removal and Installation).
-
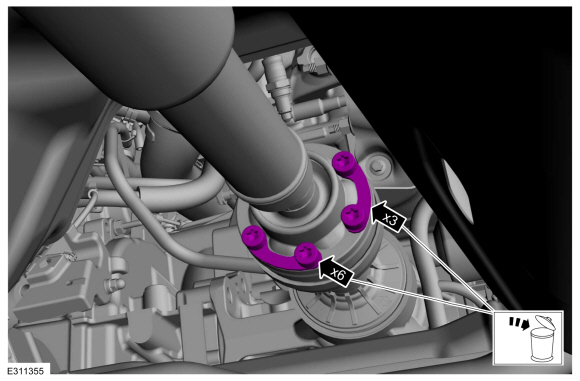
Remove and discard the driveshaft to PTU bolts and retaining straps.
-
Separate the driveshaft from the PTU flange.
-
NOTE:
Make sure that the component aligns with the installation mark.
Index-mark the driveshaft and PTU flange.
-
NOTICE:
Do not remove driveshaft from the PTU flange by
pulling on the driveshaft tube. Damage to the CV-joint can result.
Using general equipment, separate the driveshaft from the PTU flange.
Use the General Equipment: Punch
Use the General Equipment: Copper Hammer
-
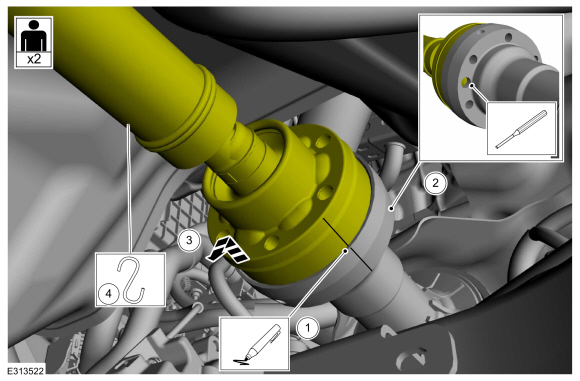
Position aside and support the driveshaft.
-
Drain the PTU.
Refer to: Power Transfer Unit Draining and Filling (307-07B Power
Transfer Unit - 2.0L EcoBoost (177kW/240PS) – MI4, General Procedures).
-
Remove the intermediate shaft.
Refer to: Intermediate Shaft (205-04 Front Drive Halfshafts, Removal and Installation).
-
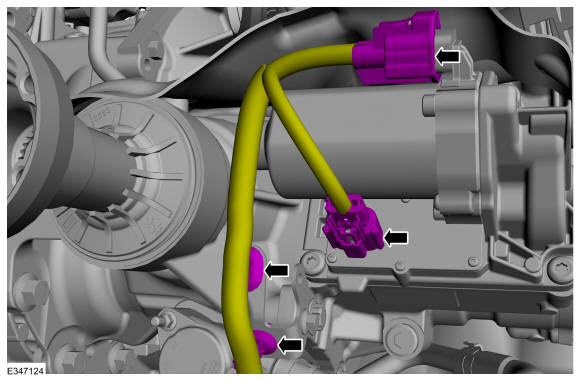
If equipped, disconnect the PTU temperature sensor
electrical connector. Disconnect the motor connectors and the retainers.
-
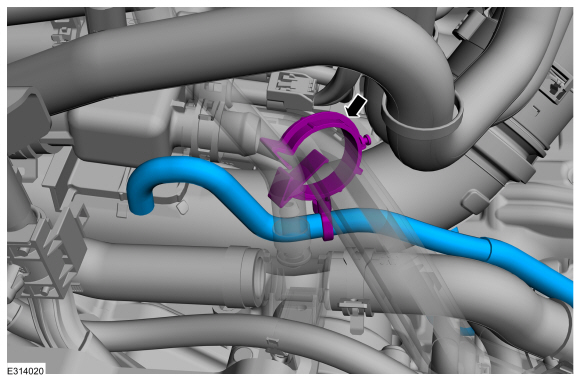
If equipped, disconnect retainer and position aside the wiring harness.
-
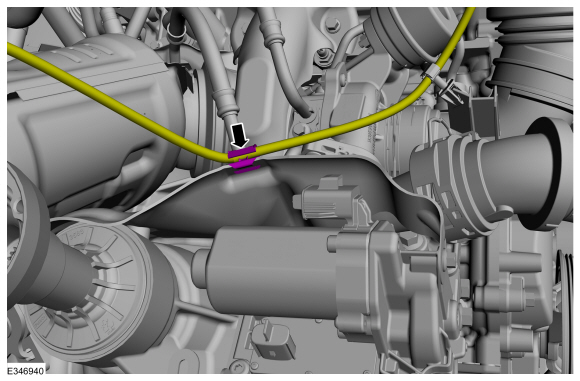
Disconnect and position aside the PTU vent hose.
-
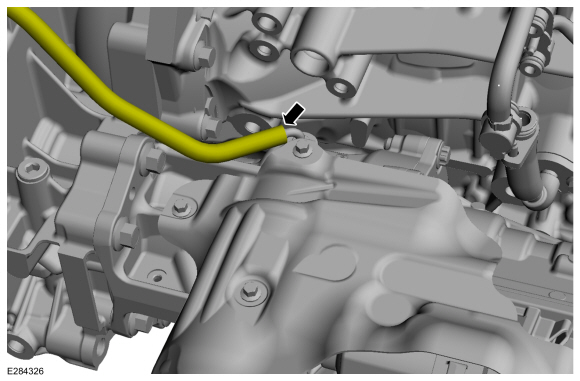
Remove the vent hose retainer.
-
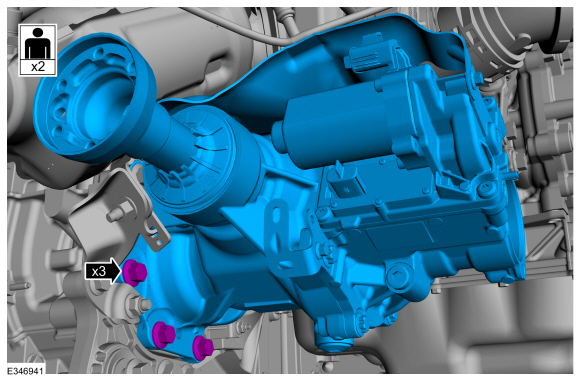
Remove the PTU support bracket bolts and the PTU support bracket.
-
Remove the PTU bolts.
-
NOTICE:
This is a tight fit, use care to not damage the transmission and PTU mating surfaces.
Remove the PTU bolts and the PTU.
-
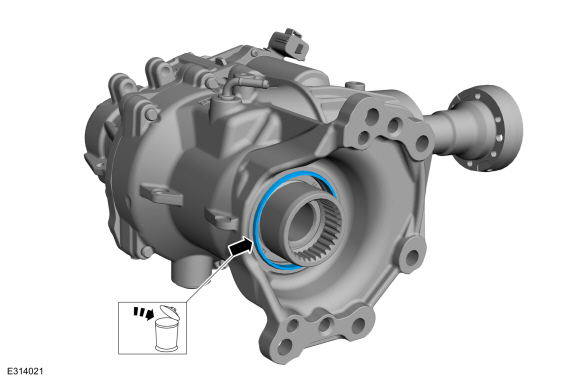
Remove and discard the PTU to transmission compression seal.
-
NOTE:
This step is only necessary when installing a new PTU or replacing a PTU seal.
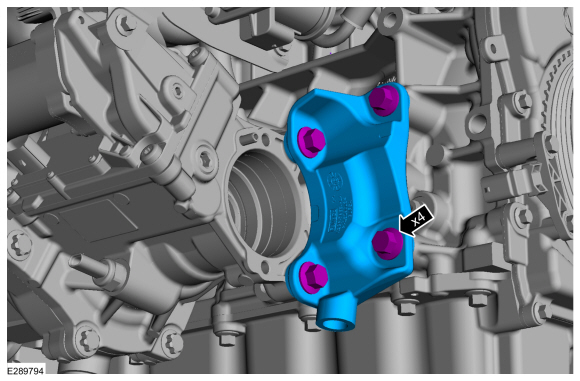
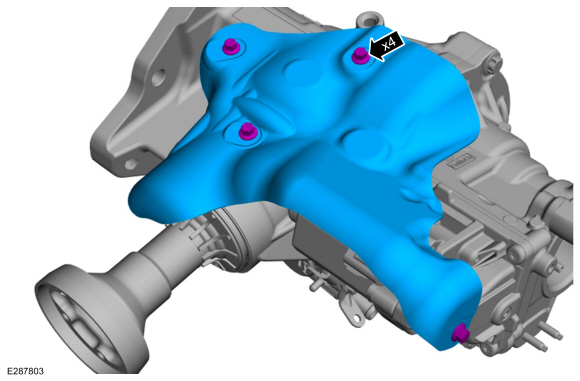
Remove the PTU heat shield bolts and PTU heat shield.
Torque:
89 lb.in (10 Nm)
-
NOTE:
This step is only necessary when installing a new PTU or replacing a PTU seal.
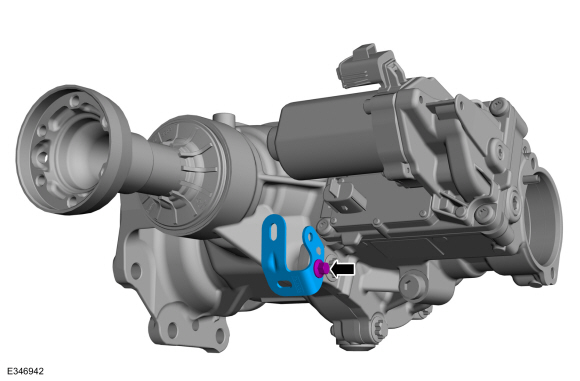
If equipped, remove the PTU temperature sensor harness bracket.
Special Tool(s) /
General Equipment
Punch
Copper Hammer
Remove the front subframe.
Refer to: Front Subframe (502-00 Uni-Body, Subframe and Mounting System, Removal and Installation)...
NOTE:
This step is only necessary when installing a new PTU or replacing a PTU seal.
Install the PTU heat shield.
Torque:
89 lb.in (10 Nm)
NOTE:
This step is only necessary when installing a new PTU or replacing a PTU seal...
Other information:
Special Tool(s) /
General Equipment
Rust Protection Coating Gun
Undercoating Gun
Materials
Name
Specification
ValuGard™ Premium UndercoatingVG101, VG101A
-
ValuGard™ Rust InhibitorVG104, VG104A
-
Motorcraft® Metal Surface Prep WipesZC-31-B
-
Repair
NOTE:
Undercoating
NOTE:
The following illustrations are not vehicle spe..
Materials
Name
Specification
Motorcraft® Silicone Brake Caliper Grease and Dielectric CompoundXG-3-A
ESA-M1C200-AESE-M1C171-A
Removal
NOTE:
Removal steps in this procedure may contain installation details.
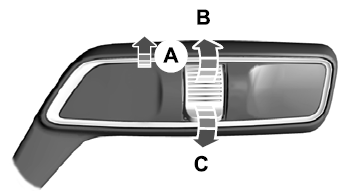
NOTE:
Do not pull the engine appearance cover forward or
sideways to remove. Failure to press straight upward on the underside of
the cover at the att..

 Removal - Power Transfer Unit - Vehicles With: Power Transfer Unit Oil-to-Coolant Cooler
 Installation - Power Transfer Unit - Vehicles With: Power Transfer Unit Oil-to-Coolant Cooler