Lincoln Corsair: Power Transfer Unit - 2.0L EcoBoost (177kW/240PS) – MI4 / Removal - Power Transfer Unit - Vehicles With: Power Transfer Unit Oil-to-Coolant Cooler
Lincoln Corsair 2020-2024 Service Manual / Powertrain / Automatic Transmission / Power Transfer Unit - 2.0L EcoBoost (177kW/240PS) – MI4 / Removal - Power Transfer Unit - Vehicles With: Power Transfer Unit Oil-to-Coolant Cooler
Special Tool(s) / General Equipment
| Punch | |
| Copper Hammer |
-
Remove the front subframe.
Refer to: Front Subframe (502-00 Uni-Body, Subframe and Mounting System, Removal and Installation).
-
Remove the catalytic converter.
Refer to: Catalytic Converter (309-00A Exhaust System - 2.0L EcoBoost (177kW/240PS) – MI4, Removal and Installation).
-
Remove and discard the driveshaft to PTU bolts and retaining straps.
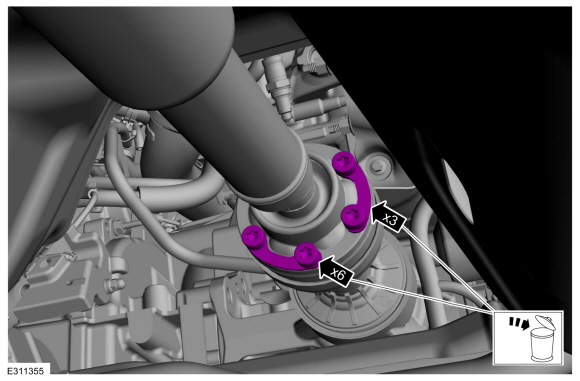 |
-
Separate the driveshaft from the PTU flange.
-
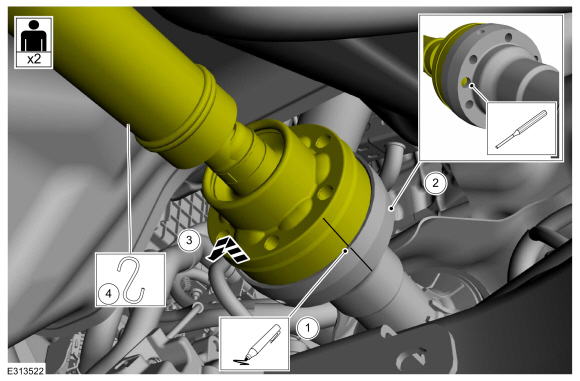
NOTE: Make sure that the component aligns with the installation mark.
Index-mark the driveshaft and PTU flange.
-
NOTICE: Do not remove driveshaft from the PTU flange by pulling on the driveshaft tube. Damage to the CV-joint can result.
Using general equipment, separate the driveshaft from the PTU flange.
Use the General Equipment: Punch
Use the General Equipment: Copper Hammer
-
Position aside and support the driveshaft.
-
 |
-
Drain the PTU.
Refer to: Power Transfer Unit Draining and Filling (307-07B Power Transfer Unit - 2.0L EcoBoost (177kW/240PS) – MI4, General Procedures).
-
Remove the intermediate shaft.
Refer to: Intermediate Shaft (205-04 Front Drive Halfshafts, Removal and Installation).
-
If equipped, disconnect the motor connectors and retainers.
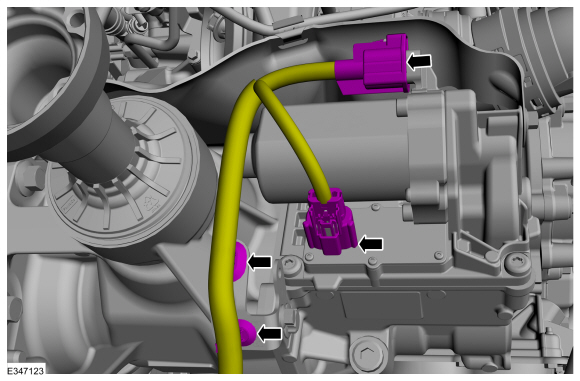 |
-
If equipped, disconnect retainer and position aside the wiring harness.
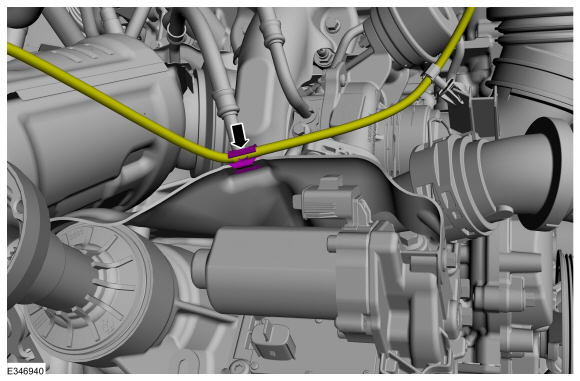 |
-
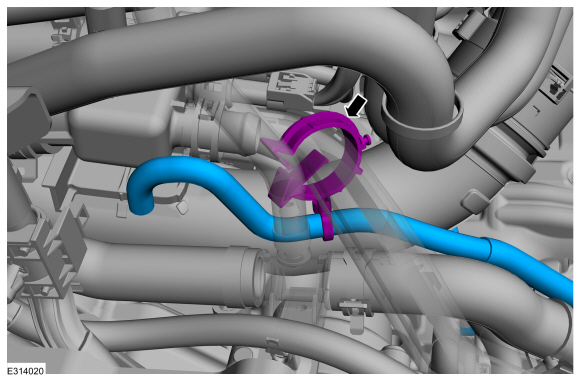
Disconnect and position aside the PTU vent hose.
 |
-
Remove the vent hose retainer.
 |
-
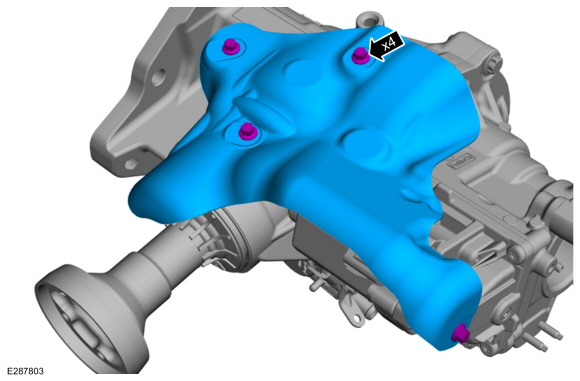
Remove the PTU support bracket bolts and the PTU support bracket.
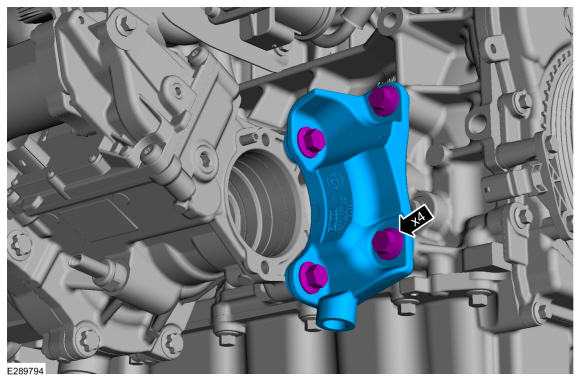 |
-
Remove the PTU bolts.
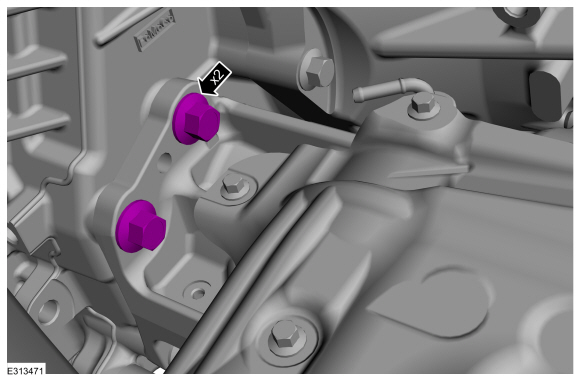 |
-
NOTICE: This is a tight fit, use care to not damage the transmission and PTU mating surfaces.
Remove the PTU bolts and the PTU.
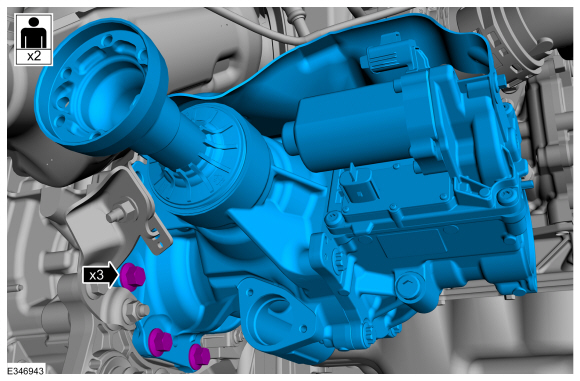 |
-
Remove and discard the PTU to transmission compression seal.
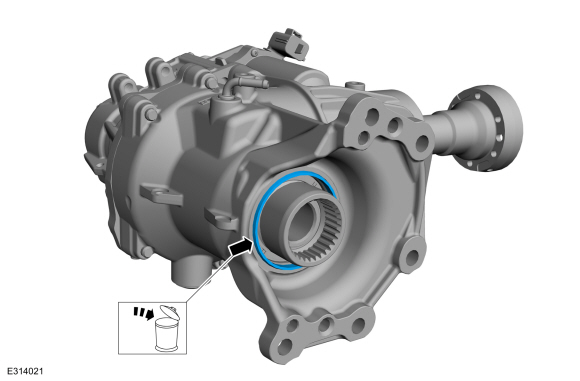 |
-
NOTE: This step is only necessary when installing a new PTU or replacing a PTU seal.
Remove the PTU heat shield bolts and PTU heat shield.
Torque: 89 lb.in (10 Nm)
 |
-
NOTE: This step is only necessary when installing a new PTU or replacing a PTU seal.
If equipped, remove the PTU temperature sensor harness bracket.
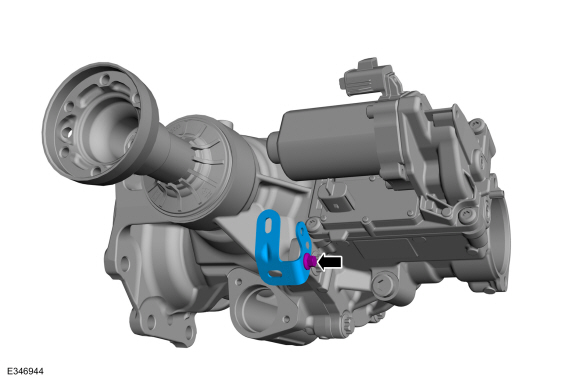 |
 Removal and Installation - Power Transfer Unit Rear Seal
Special Tool(s) /
General Equipment
205-199
(T83T-3132-A1)
Installer, Spindle/Axle ShaftT83-4000-ATKIT-1983-FTKIT-1983-FLMTKIT-1983-FX
308-777Remover and Installer, PTU Input Shaft Seal
308-969Installer, Pinion Seal
Slide Hammer Dent Puller
Plastic Mallet
Two Leg Puller
Removal
Remove the PTU...
 Removal - Power Transfer Unit - Vehicles Without: Power Transfer Unit Oil-to-Coolant Cooler
Special Tool(s) /
General Equipment
Punch
Copper Hammer
Remove the front subframe.
Refer to: Front Subframe (502-00 Uni-Body, Subframe and Mounting System, Removal and Installation)...
Other information:
Lincoln Corsair 2020-2024 Service Manual: Diagnosis and Testing - Front Drive Halfshafts
Preliminary Inspection Visually inspect the CV joints, housing, boots, and clamps for obvious signs of mechanical damage. If an obvious cause for an observed or reported concern is found, correct the cause (if possible) before proceeding to the next step If the cause is not visually evident, verify the symptom and REFER to Symptom Chart: NVH...
Lincoln Corsair 2020-2024 Owners Manual: Steering
Electric Power Steering WARNING: The electric power steering system has diagnostic checks that continuously monitor the system. If a fault is detected, a message displays in the information display. Stop your vehicle as soon as it is safe to do so...
Categories
- Manuals Home
- 1st Generation Lincoln Corsair Owners Manual
- 1st Generation Lincoln Corsair Service Manual
- Auto-Start-Stop
- Programming the Garage Door Opener to Your Hand-Held Transmitter
- Automatic Transmission - 8-Speed Automatic Transmission – 8F35/8F40
- New on site
- Most important about car
Selecting a Drive Mode. DRIVE MODES
Selecting a Drive Mode
Note: Drive mode changes may not be available when the ignition is off.
Copyright © 2024 www.licorsair.com