Lincoln Corsair: Power Transfer Unit - 2.0L EcoBoost (177kW/240PS) – MI4 / Installation - Power Transfer Unit - Vehicles With: Power Transfer Unit Oil-to-Coolant Cooler
-
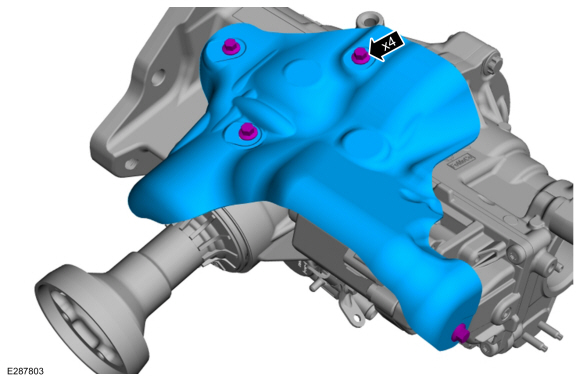
NOTE:
This step is only necessary when installing a new PTU or replacing a PTU seal.
Install the PTU heat shield.
Torque:
89 lb.in (10 Nm)
-
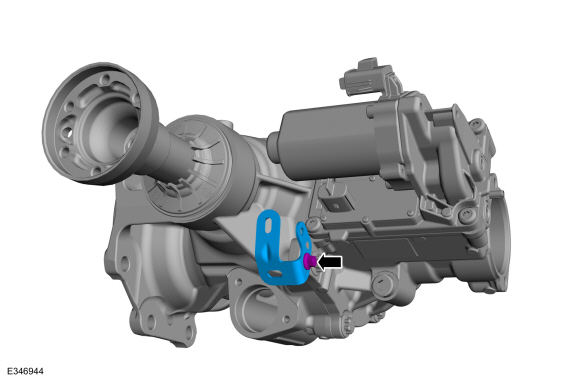
NOTE:
This step is only necessary when installing a new PTU or replacing a PTU seal.
If equipped, install the wiring harness bracket.
Torque:
97 lb.in (11 Nm)
-
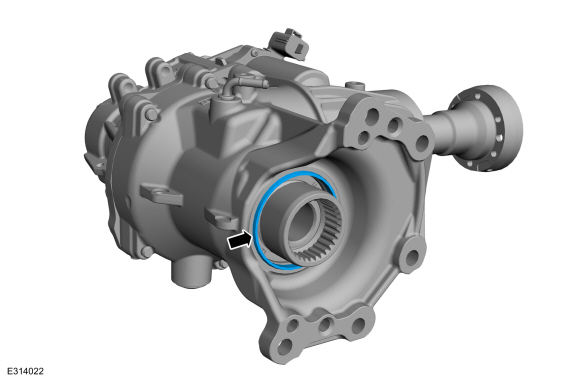
Install the new PTU to transmission compression seal.
-
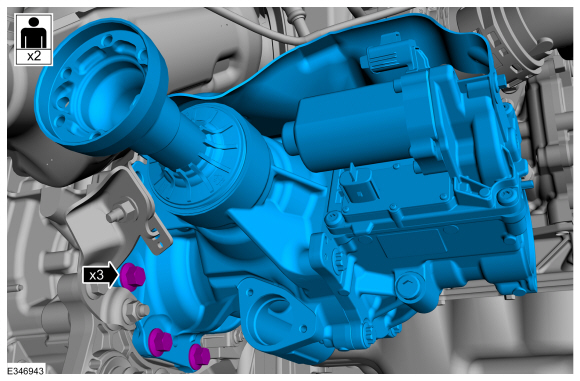
Install the PTU and mounting bolts.
Torque:
76 lb.ft (103 Nm)
-
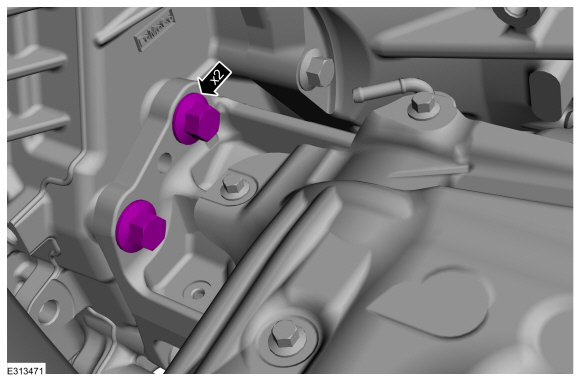
Install the new PTU bolts.
Torque:
76 lb.ft (103 Nm)
-
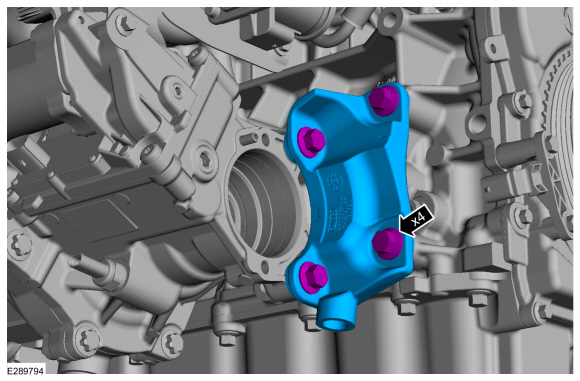
Install the PTU support bracket and bolts.
Torque:
35 lb.ft (48 Nm)
-
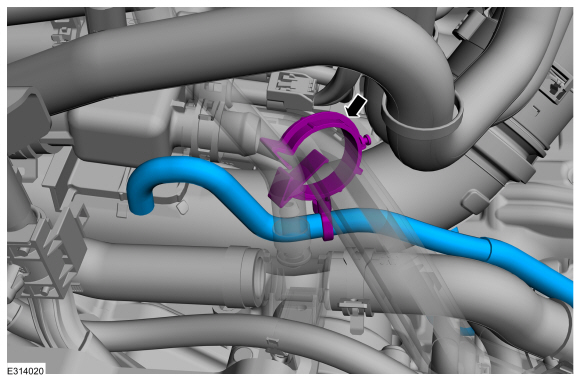
Install the vent hose retainer.
-
NOTE:
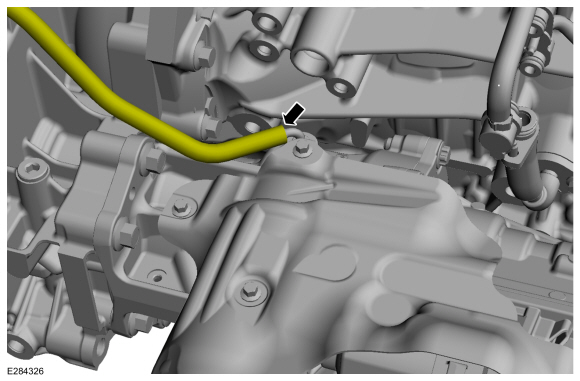
The PTU vent hose should be replaced whenever a new PTU is installed.
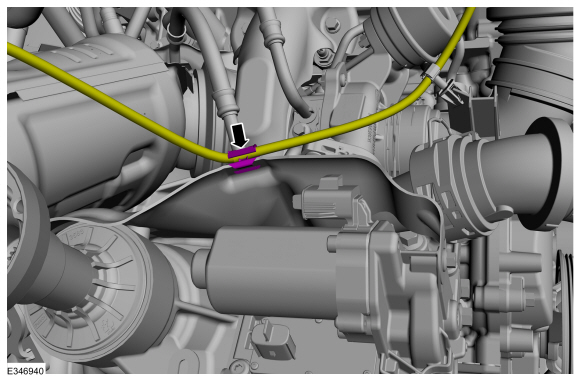
Connect the PTU vent hose.
-
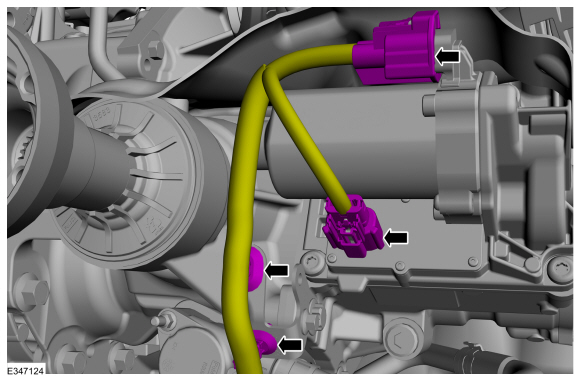
If equipped, position back the wiring harness and connect retainer.
-
If equipped, connect the motor connectors and retainers.
-
Install the intermediate shaft.
Refer to: Intermediate Shaft (205-04 Front Drive Halfshafts, Removal and Installation).
-
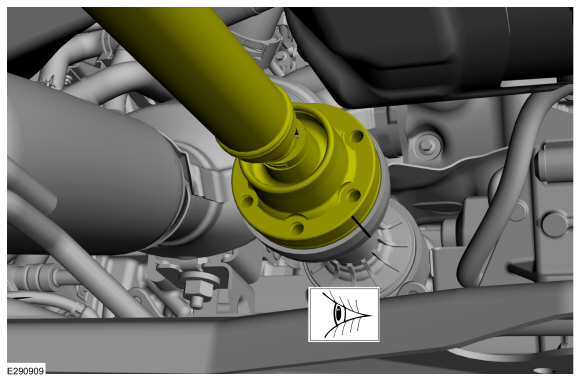
NOTE:
Make sure that the installation marks are aligned.
-
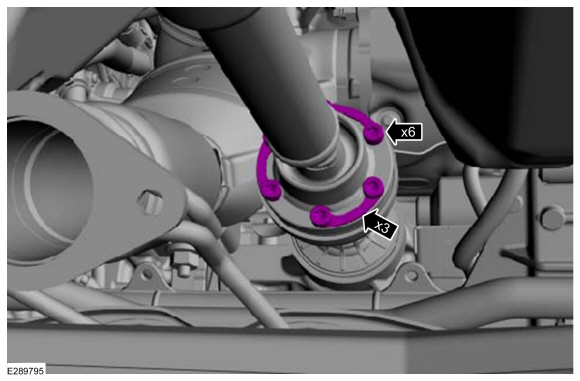
Install new PTU flange bolts.
Torque:
26 lb.ft (35 Nm)
-
Install the catalytic converter.
Refer to: Catalytic Converter (309-00A Exhaust System - 2.0L EcoBoost (177kW/240PS) – MI4, Removal and Installation).
-
Install the front subframe.
Refer to: Engine Front Undershield (501-02 Front End Body Panels, Removal and Installation).
-
Fill the PTU.
Refer to: Power Transfer Unit Draining and Filling (307-07B Power
Transfer Unit - 2.0L EcoBoost (177kW/240PS) – MI4, General Procedures).
Special Tool(s) /
General Equipment
Punch
Copper Hammer
Remove the front subframe.
Refer to: Front Subframe (502-00 Uni-Body, Subframe and Mounting System, Removal and Installation)...
NOTE:
This step is only necessary when installing a new PTU or replacing a PTU seal.
Install the PTU heat shield.
Torque:
89 lb.in (10 Nm)
NOTE:
This step is only necessary when installing a new PTU or replacing a PTU seal...
Other information:
System Operation
Air Fuel Ratio Imbalance Monitor
The air fuel ratio imbalance monitor is an on board diagnostic strategy designed to monitor the air fuel ratio.
Air Fuel Ratio Imbalance Monitor — Heated Oxygen Sensor (HO2S) Monitor
The air fuel ratio imbalance monitor estimates the cylinder to
cylinder air fuel ratio difference using the universal HO2S
high frequency signal...
Nearly all engines consume oil, which is essential for
normal lubrication of the cylinder bore walls and pistons and rings.
Determining the level of oil consumption may require testing by
recording how much oil is being added over a given set of miles...
 Removal - Power Transfer Unit - Vehicles Without: Power Transfer Unit Oil-to-Coolant Cooler
 Installation - Power Transfer Unit - Vehicles Without: Power Transfer Unit Oil-to-Coolant Cooler