Lincoln Corsair: Front Seats / Removal and Installation - Front Seat Cushion Extension Adjuster - Vehicles With: Multi-Contour Seats
Removal
NOTE:
Removal steps in this procedure may contain installation details.
-
Remove the front seat.
Refer to: Front Seat (501-10A Front Seats, Removal and Installation).
-
Remove the front seat side shield screws.
-
Remove the LH front seat side shield.
-
Lift up and out, separating the front seat side shield from the recliner bracket.
-
Slide the front seat side shield forward and separate the front seat side shield from the front seat.
-
Remove the RH front seat side shield.
-
Lift up and out, separating the front seat side shield from the recliner bracket.
-
Slide the front seat side shield forward and separate the front seat side shield from the front seat.
-
Remove the screws and the LH front seat inner side shield.
-
Remove the screws and the RH front seat inner side shield.
-
Remove the front seat cushion blower motor.
Refer to: Front Seat Cushion Blower Motor (501-10A Front Seats, Removal and Installation).
-
Remove the front seat cushion cover.
Refer to: Front Seat Cushion Cover - Vehicles With: Multi-Contour Seats (501-10A Front Seats, Removal and Installation).
-
Remove the front seat cushion adjuster.
Refer to: Front Seat Cushion Adjuster - Vehicles With: Multi-Contour Seats (501-10A Front Seats, Removal and Installation).
-
Remove the front seat backrest cover.
Refer to: Front Seat Backrest Cover (501-10A Front Seats, Removal and Installation).
-
On both sides.
Remove the screws and lift the front seat valance.
-
Remove the pin-type retainers and the front seat valance.
-
Remove the DSM .
Refer to: Driver Front Seat Module (DSM) (501-10A Front Seats, Removal and Installation).
-
Detach and disconnect the front seat cushion extension adjuster electrical connectors.
-
Detach the front seat wiring harness and position aside.
-
Remove the screws and position the front seat wiring harnesses aside.
-
Detach the front seat electrical connector and position aside.
-
On both sides.
Remove the front seat cushion extension adjuster bolts.
Torque:
53 lb.in (6 Nm)
-
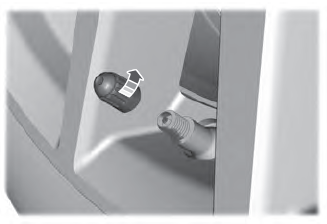
Remove the screw and the front seat cushion extension adjuster front clamp.
-
Remove the screws and position the front seat cushion extension adjuster rear clamps down.
-
Lift the rear of the front seat cushion extension adjuster.
-
Remove the front seat cushion extension adjuster.
Installation
-
To install, reverse the removal procedure.
Removal
NOTE:
Driver seat shown, passenger seat similar.
Remove the front seat cushion cover.
Refer to: Front Seat Cushion Cover - Vehicles With: Multi-Contour Seats (501-10A Front Seats, Removal and Installation)...
Removal
NOTE:
Driver seat shown, passenger seat similar.
Move the front seat to the full upward and forward position.
Depower the SRS ...
Other information:
Overview
The ABS
and stability control systems are comprised of the following
subsystems which assist the driver in maintaining control of the
vehicle:
ABS
EBD
EPB control
ESC
Hill start assist
Hydraulic fade compensation
RSC
Selectable drive modes
Supplemental braking assist
Supports adaptive cruise control
Suppor..
Special Tool(s) /
General Equipment
Fluid Suction Gun
Hose Clamp Remover/Installer
Locking Pliers
Removal
WARNING:
Always allow the engine to cool before opening the cooling
system. Do not unscrew the coolant pressure relief cap when the engine
is operating or the cooling system is hot. The cooling system is under
pressure; steam and hot liquid can come out fo..
.jpg)
.jpg)
.jpg)
.jpg)
.jpg)
.jpg)
.jpg)
.jpg)
.jpg)
.jpg)
.jpg)
.jpg)
.jpg)
.jpg)
 Removal and Installation - Front Seat Cushion Adjuster - Vehicles With: Multi-Contour Seats
 Removal and Installation - Front Seat Cushion Blower Motor