Lincoln Corsair: Body Closures / General Procedures - Front Door Alignment
Lincoln Corsair 2020-2026 Service Manual / Body and Paint / Body and Paint / Body Closures / General Procedures - Front Door Alignment
Special Tool(s) / General Equipment
| Interior Trim Remover |
Inspection
NOTE: Removal steps in this procedure may contain installation details.
NOTE: LH side shown, RH side similar.
-
Inspect the front door-to-body dimensions.
.jpg) |
Adjustment
NOTE: Removal steps in this procedure may contain installation details.
NOTE: LH side shown, RH side similar.
All alignments
-
Open the door.
.jpg) |
-
Remove the bolts and the striker assembly.
.jpg) |
Front door in and out, up and down alignment
-
Loosen the bolts to permit movement of the door.
Loosen:
: 2 turn(s)
.jpg) |
-
Adjust door as required.
.jpg) |
-
Tighten the fasteners.
Torque: 35 lb.ft (48 Nm)
.jpg) |
Front door fore, aft and tilt alignment
-
Release the clips and remove the instrument panel side trim panel.
Use the General Equipment: Interior Trim Remover
.jpg) |
-
Remove the instrument panel lower trim panel.
-
Release the clips.
Use the General Equipment: Interior Trim Remover
-
Disconnect the headlamp control switch electrical connector.
-
Release the clips.
.jpg) |
-
Remove the glove compartment.
Refer to: Glove Compartment (501-12 Instrument Panel and Console, Removal and Installation).
-
-
Loosen the bolts to permit movement of the door.
Loosen:
: 2 turn(s)
-
Loosen the bolt to permit movement of the door.
Loosen:
: 2 turn(s)
-
Loosen the bolts to permit movement of the door.
.jpg) |
-
Carefully close the door.
.jpg) |
-
Adjust the door as required.
.jpg) |
-
Carefully open the door.
|
-
-
Tighten the fastener.
Torque: 22 lb.ft (30 Nm)
-
Tighten the fasteners.
Torque: 22 lb.ft (30 Nm)
-
Tighten the fastener.
.jpg) |
All alignments
-
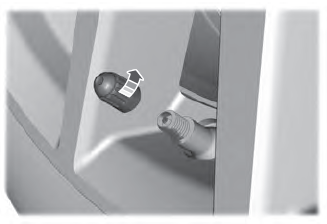
Install the striker assembly.
|
-
Loosen the bolts to permit movement of the striker assembly.
Loosen:
: 2 turn(s)
.jpg) |
-
Tighten the fasteners.
Torque: 18 lb.ft (25 Nm)
.jpg) |
-
Inspect the front door-to-body dimensions.
|
-
Install the removed components.
 Diagnosis and Testing - Body Closures
Diagnostic Trouble Code (DTC) Chart
Diagnostics in this manual assume a certain skill level and knowledge of Ford-specific diagnostic practices. REFER to: Diagnostic Methods (100-00 General Information, Description and Operation)...
 General Procedures - Hood Alignment
Inspection
NOTE:
Removal steps in this procedure may contain installation details.
Inspect the hood-to-body dimensions.
All alignments
Open the hood...
Other information:
Lincoln Corsair 2020-2026 Service Manual: Removal and Installation - Liftgate Strut
Removal NOTE: LH side shown, RH side similar. NOTICE: Support the liftgate before removing the liftgate strut. Failure to follow this direction may result in damage to the components. Remove the clips and the liftgate strut. Installation To install, reverse the removal procedure...
Lincoln Corsair 2020-2026 Service Manual: Removal and Installation - Steering Column Control Switch
Removal NOTE: Removal steps in this procedure may contain installation details. Remove the steering column shrouds. Refer to: Steering Column Shrouds (501-05 Interior Trim and Ornamentation, Removal and Installation). Remove the retainer and disconnect the steering column control switch electrical connector...
Categories
- Manuals Home
- 1st Generation Lincoln Corsair Owners Manual
- 1st Generation Lincoln Corsair Service Manual
- Head Up Display
- Auto-Start-Stop
- Technical Specifications
- New on site
- Most important about car
Second Stage: Checking Tire Pressure
WARNING: If the tire does not inflate to the recommended tire pressure within 15 minutes, stop and call roadside assistance.
WARNING: The power plug may get hot after use and should be handled carefully when unplugging.
Check the air pressure of your tires as follows:
Copyright © 2026 www.licorsair.com