Lincoln Corsair: Exterior Trim and Ornamentation / General Procedures - Finish Panel Repair
Repair
NOTE: Mouldings located on the front and rear window frames may experience minor scratches from vehicle shipment or car wash racks. The imperfections may be repaired instead of replacing components by following the steps below.
NOTE: Scratches deep enough to cause a thumb nail to catch cannot be repaired and the component must be replaced.
-
Clean with a mild soap and water wash, and dry the affected panels.
-
Apply protective masking to adjacent components.
-
Apply a small amount of clear coat and plastic
formulated polishing compound (obtain locally) to a 3 inch polisher with
an appropriate foam pad attached.
-
NOTE: Do not allow the polishing compound to dry while polishing the component.
Thoroughly polish the component.
-
Reclean with a mild soap and water wash and dry the polished panels.
-
If the scratches are repaired return the vehicle.
-
If the scratches remain, continue with the following steps.
-
If the scratches are repaired return the vehicle.
-
Choose a sandpaper grit appropriate to the scratch severity.
-
For very minor scratches, use a 3 inch 3000 grit sandpaper (obtain locally).
-
For minor scratches, use a 3 inch 1000 grit sandpaper (obtain locally).
-
For heavier scratches that do not catch a thumb nail
when pulled across the scratch, use a 3 inch 800 grit sandpaper (obtain
locally).
-
For scratches that are too deep to remove with 800 grit sandpaper, install a new component.
-
For very minor scratches, use a 3 inch 3000 grit sandpaper (obtain locally).
-
NOTICE: Do not remove any more material than necessary or component replacement will be required.
Apply the appropriate sandpaper to a 3 inch Dual Action (D/A) sander and carefully sand the component until all the damage has been removed.
-
Use progressively finer sandpaper with the 3 inch D/A
sander and repeat the process. Finish the sanding with 3000 grit
sandpaper.
-
Apply a small amount of clear coat and plastic
formulated rubbing compound (obtain locally) to a 3 inch polisher with
an appropriate foam pad attached.
-
NOTE: Do not allow the rubbing compound to dry while polishing the component.
Buff the component until the sanding scratches have been completely removed.
-
Apply a small amount of clear coat and plastic
formulated polishing compound (obtain locally) to a 3 inch polisher with
an appropriate clean foam pad attached.
-
NOTE: Do not allow the rubbing compound to dry while polishing the component.
Polish the component until the buffing swirl marks are removed.
-
Continue polishing the component until the original level of shine is present.
-
Apply a small amount of clear coat and plastic
formulated hand glaze (obtain locally) to a soft and clean shop cloth
and hand polish to remove swirl marks left by the 3 inch polisher.

 Removal and Installation - A-Pillar Moulding
Special Tool(s) /
General Equipment
Interior Trim Remover
Removal
NOTICE:
Only use moderate force.
NOTE:
Removal steps in this procedure may contain installation details...
Other information:
Lincoln Corsair 2020-2026 Owners Manual: General Information
WARNING: Failure to follow these guidelines could result in an increased risk of loss of vehicle control, injury or death. Note: Do not use the kit if a tire has become severely damaged. Only punctures located within the tire tread can be sealed with the kit...
Lincoln Corsair 2020-2026 Service Manual: Diagnosis and Testing - Engine Starting Control System
Diagnostic Trouble Code (DTC) Chart Diagnostics in this manual assume a certain skill level and knowledge of Ford-specific diagnostic practices. REFER to: Diagnostic Methods (100-00 General Information, Description and Operation). Module DTC Description Action PCM P164C:00 Internal Control Module Start-Stop Performance: No Sub Type Information GO to Pinpoint Test AA PCM P1..
Categories
- Manuals Home
- 1st Generation Lincoln Corsair Owners Manual
- 1st Generation Lincoln Corsair Service Manual
- Refueling - Gasoline
- Memory Function
- Opening and Closing the Hood
- New on site
- Most important about car
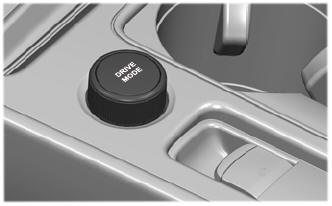
Selecting a Drive Mode. DRIVE MODES
Selecting a Drive Mode
Note: Drive mode changes may not be available when the ignition is off.