Lincoln Corsair: Power Transfer Unit - 2.0L EcoBoost (177kW/240PS) – MI4 / Removal and Installation - Power Transfer Unit Rear Seal
Lincoln Corsair 2020-2024 Service Manual / Powertrain / Automatic Transmission / Power Transfer Unit - 2.0L EcoBoost (177kW/240PS) – MI4 / Removal and Installation - Power Transfer Unit Rear Seal
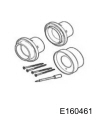
Special Tool(s) / General Equipment
 |
205-199
(T83T-3132-A1)
Installer, Spindle/Axle Shaft T83-4000-A TKIT-1983-F TKIT-1983-FLM TKIT-1983-FX |
 |
308-777 Remover and Installer, PTU Input Shaft Seal |
 |
308-969 Installer, Pinion Seal |
| Slide Hammer Dent Puller | |
| Plastic Mallet | |
| Two Leg Puller | |
Removal
-
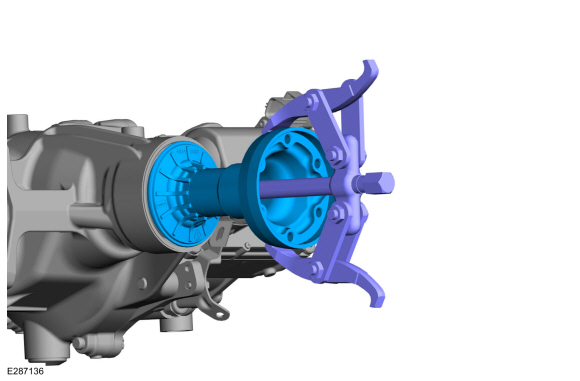
Remove the PTU.
Refer to: Power Transfer Unit - Vehicles With: Power Transfer Unit Oil-to-Coolant Cooler (307-07B Power Transfer Unit - 2.0L EcoBoost (177kW/240PS) – MI4, Removal).
Refer to: Power Transfer Unit - Vehicles Without: Power Transfer Unit Oil-to-Coolant Cooler (307-07B Power Transfer Unit - 2.0L EcoBoost (177kW/240PS) – MI4, Removal).
-
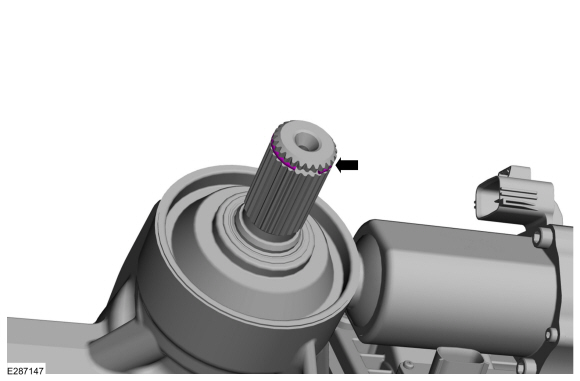
Using the two leg puller remove the companion flange.
Use the General Equipment: Two Leg Puller
 |
-
Remove and discard retaining clip.
 |
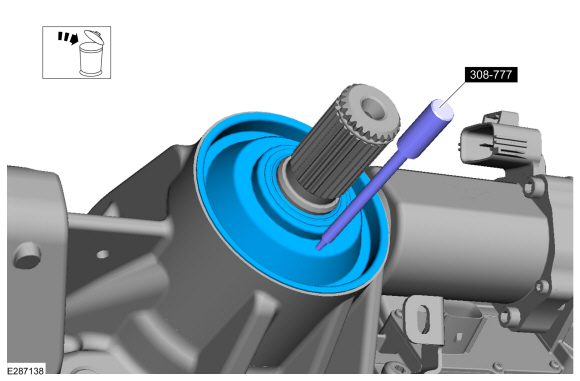
-
Using the tool, pierce the seal. Remove and discard pinion seal using dent puller.
Use Special Service Tool: 308-777 Remover and Installer, PTU Input Shaft Seal.
Use the General Equipment: Slide Hammer Dent Puller
 |
Installation
-
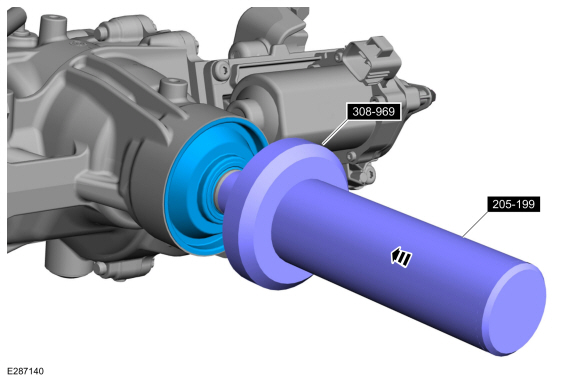
Position the tool on the pinion shaft.
Use Special Service Tool: 308-969 Installer, Pinion Seal.
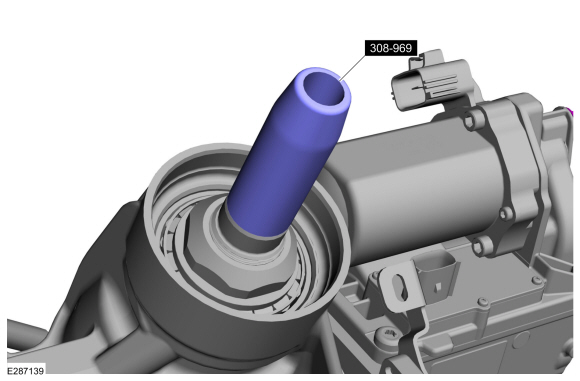 |
-
Using the tool install the pinion seal.
Use Special Service Tool: 308-969 Installer, Pinion Seal. , 205-199 (T83T-3132-A1) Installer, Spindle/Axle Shaft.
 |
-
Install new retaining clip.
 |
-
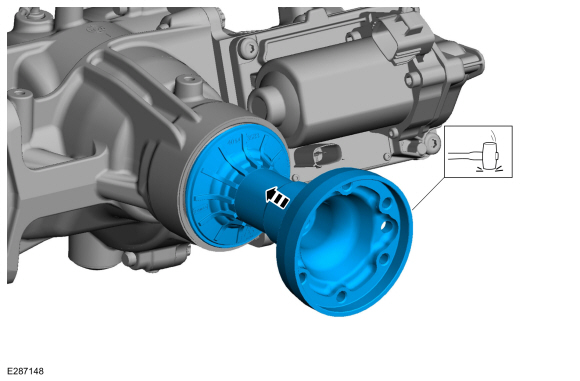
NOTE: Place wooden block on the flange and hammer on the wood using mallet.
Install the companion flange.
Use the General Equipment: Plastic Mallet
 |
-
Install the PTU.
Refer to: Power Transfer Unit - Vehicles With: Power Transfer Unit Oil-to-Coolant Cooler (307-07B Power Transfer Unit - 2.0L EcoBoost (177kW/240PS) – MI4, Installation).
Refer to: Power Transfer Unit - Vehicles Without: Power Transfer Unit Oil-to-Coolant Cooler (307-07B Power Transfer Unit - 2.0L EcoBoost (177kW/240PS) – MI4, Installation).
 Removal and Installation - Power Transfer Unit Input Shaft Seal RH
Special Tool(s) /
General Equipment
100-001
(T50T-100-A)
Slide Hammer
205-153
(T80T-4000-W)
Handle
308-777Remover and Installer, PTU Input Shaft Seal
308-970Installer, RH halfshaft Seal
308-973Remover, PTU Input Sleeve
Removal
With the vehicle in NEUTRAL, position it on a hoist...
 Removal - Power Transfer Unit - Vehicles With: Power Transfer Unit Oil-to-Coolant Cooler
Special Tool(s) /
General Equipment
Punch
Copper Hammer
Remove the front subframe.
Refer to: Front Subframe (502-00 Uni-Body, Subframe and Mounting System, Removal and Installation)...
Other information:
Lincoln Corsair 2020-2024 Service Manual: Removal and Installation - Front Door Window Regulator and Motor
Special Tool(s) / General Equipment Punch Removal WARNING: The following procedure prescribes critical repair steps required for correct restraint system operation during a crash. Follow all notes and steps carefully. Failure to follow step instructions may result in incorrect operation of the restraint system and increases the risk of serious personal injury or death in..
Lincoln Corsair 2020-2024 Service Manual: Removal and Installation - Front Halfshaft RH - AWD
Special Tool(s) / General Equipment 204-161 (T97P-1175-A) Installer, HalfshaftTKIT-1997-LM2TKIT-1997-F/FM2TKIT-1997-FLM2 205-D070 (D93P-1175-B) Remover, Front Wheel Hub Tie Rod End Remover Removal Remove the wheel and tire. Refer to: Wheel and Tire (204-04A Wheels and Tires, Removal and Installation). Remove the retainers and the underbody s..
Categories
- Manuals Home
- 1st Generation Lincoln Corsair Owners Manual
- 1st Generation Lincoln Corsair Service Manual
- Programming the Garage Door Opener to Your Garage Door Opener Motor
- Refueling - Gasoline
- Opening and Closing the Hood
- New on site
- Most important about car
Audio Unit
WARNING: Driving while distracted can result in loss of vehicle control, crash and injury. We strongly recommend that you use extreme caution when using any device that may take your focus off the road. Your primary responsibility is the safe operation of your vehicle. We recommend against the use of any hand-held device while driving and encourage the use of voice-operated systems when possible. Make sure you are aware of all applicable local laws that may affect the use of electronic devices while driving.

Copyright © 2024 www.licorsair.com