Lincoln Corsair: Automatic Transmission - 8-Speed Automatic Transmission – 8F35/8F40 / Removal and Installation - Solenoid
Materials
| Name | Specification |
|---|---|
| Motorcraft® MERCON® ULV Automatic Transmission Fluid XT-12-QULV |
WSS-M2C949-A, MERCON® ULV |
Removal
NOTICE: Failure to match the replacement solenoid service band to the original solenoid can cause damage to the transmission or erratic engagements and shifts.
NOTE: The solenoids that are being re-used must be marked during the removal and reinstalled in the exact bore location.
NOTE: While removing and installing solenoids, never handle the plastic connector.
-
Using the scan tool Transmission Solenoid Identification
Number (IDN) function, retrieve the solenoid base part number and
stamping number.
Refer to: Transmission Description (307-01A) .
-
Remove the main control valve body.
Refer to: Main Control Valve Body (307-01A Automatic Transmission - 8-Speed Automatic Transmission – 8F35/8F40, Removal and Installation).
-
Remove the solenoid body from the main control valve body.
Refer to: Main Control Valve Body (307-01A Automatic Transmission - 8-Speed Automatic Transmission – 8F35/8F40, Overhaul).
-
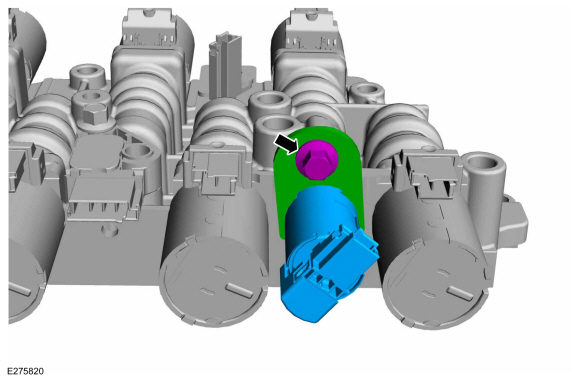
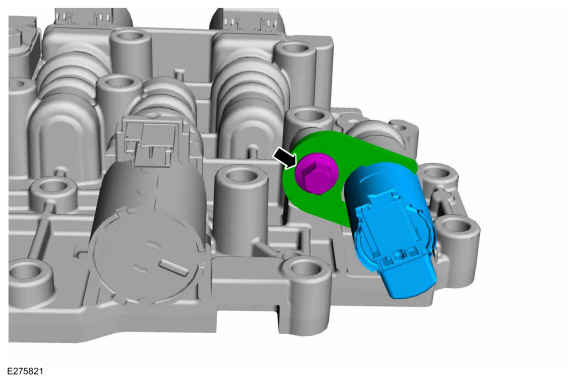
Remove the bolts and the park lock solenoid.
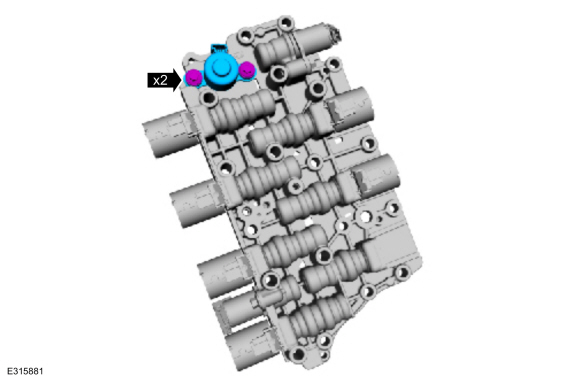 |
-
NOTICE: The solenoids are calibrated from the factory and are not all the same. Failure to mark the solenoids to the ports they were originally in can result in mixing the solenoids and can cause damage to the transmission or a harsh shift.
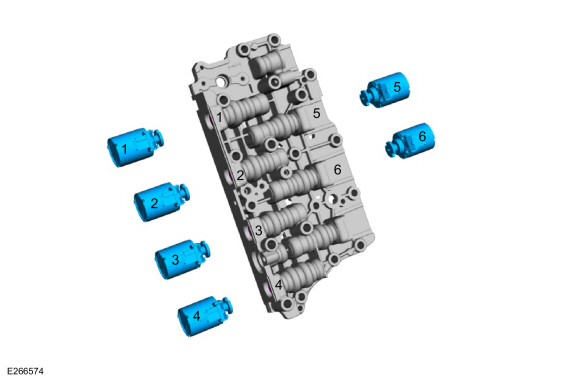
NOTE: Note the position of the components before removal.
-
SSA (CB12345)
-
SSF (CB28)
-
SSB (C46R)
-
SSD (SOWC)
-
SSE (C5678)
-
SSC (CB37)
-
SSA (CB12345)
 |
-
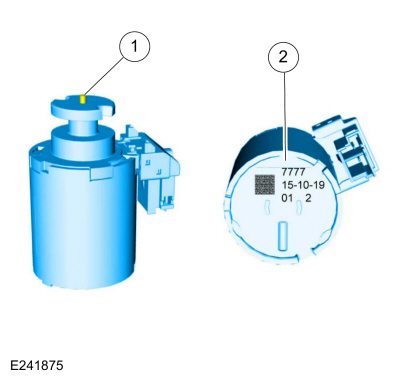
NOTE: If installing a new component, determine the part number.
-
Armature/pin assembly
-
Part information
-
Armature/pin assembly
 |
-
NOTE: All other shift solenoids similar.
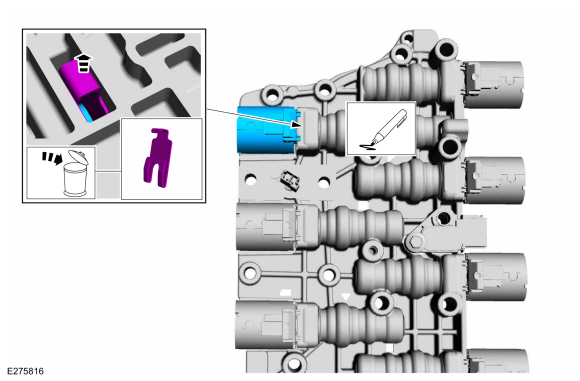
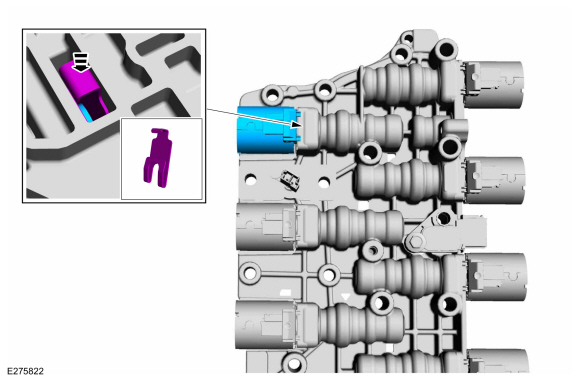
Discard the retainer clip and remove the suspect solenoid. All other solenoids can remain in place.
 |
-
-
TCC solenoid
-
LPC solenoid
-
TCC solenoid
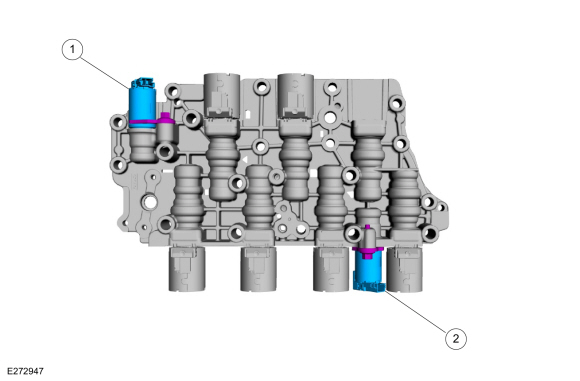 |
-
NOTE: If installing a new component, determine the part number.
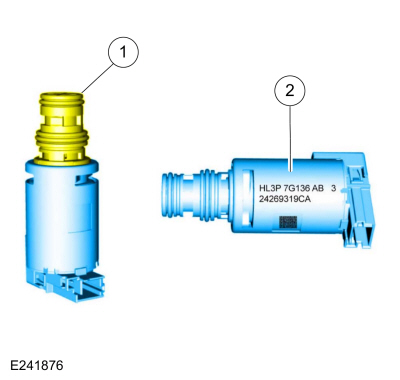
-
Solenoid nozzle
-
Part information
-
Solenoid nozzle
 |
-
Remove the bolt and the clamp. Remove the TCC solenoid.
 |
-
Remove the bold and the clamp. Remove the LPC solenoid.
 |
Installation
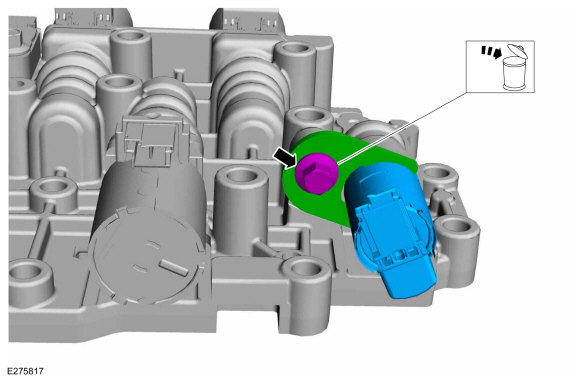
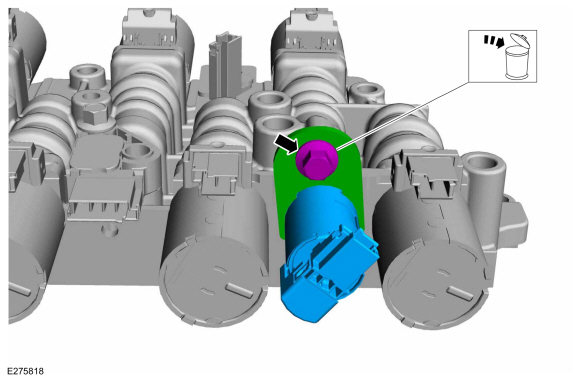
NOTICE: Extreme cleanliness must be exercised when handling the components.
NOTICE: Make sure that solenoids are installed to the position noted before removal to prevent the damage to the transmission.
-
Lubricate the TCC and the LPC solenoid O-rings seals with automatic transmission fluid.
Material: Motorcraft® MERCON® ULV Automatic Transmission Fluid / XT-12-QULV (WSS-M2C949-A, ) (MERCON® ULV)
 |
-
-
TCC solenoid
-
LPC solenoid
-
TCC solenoid
|
-
NOTE: If installing a new component, determine the part number.
-
Solenoid nozzle
-
Part information
-
Solenoid nozzle
|
-
Install the LPC solenoid. Install the bold and the clamp.
Torque: 14 lb.in (1.6 Nm)
 |
-
Install the TCC solenoid. Install the bolt and the clamp.
Torque: 14 lb.in (1.6 Nm)
 |
-
NOTICE: The solenoids are calibrated from the factory and are not all the same. Failure to mark the solenoids to the ports they were originally in can result in mixing the solenoids and can cause damage to the transmission or a harsh shift.
NOTE: Note the position of the components before removal.
-
SSA (CB12345)
-
SSF (CB28)
-
SSB (C46R)
-
SSD (SOWC)
-
SSE (C5678)
-
SSC (CB37)
-
SSA (CB12345)
|
-
NOTE: If installing a new component, determine the part number.
-
Armature/pin assembly
-
Part information
-
Armature/pin assembly
|
-
NOTICE: Make sure that solenoids are installed to the position noted before removal to prevent the damage to the transmission.
Install the solenoid and the retainer clip.
 |
-
Install the park lock solenoid and the bolts.
Torque: 53 lb.in (6 Nm)
|
-
Install the solenoid body to the main control valve body.
Refer to: Main Control Valve Body (307-01A Automatic Transmission - 8-Speed Automatic Transmission – 8F35/8F40, Overhaul).
-
Install the main control valve body.
Refer to: Main Control Valve Body (307-01A Automatic Transmission - 8-Speed Automatic Transmission – 8F35/8F40, Removal and Installation).
 Removal and Installation - Roll Restrictor RH
Special Tool(s) /
General Equipment
Wooden Block
Removal
With the vehicle in NEUTRAL, position it on a hoist.
Refer to: Jacking and Lifting - Overview (100-02 Jacking and Lifting, Description and Operation)...
 Removal and Installation - Turbine Shaft Speed (TSS) Sensor and Intermediate Speed Sensor A (ISSA)
Removal
With the vehicle in NEUTRAL, position it on a hoist.
Refer to: Jacking and Lifting - Overview (100-02 Jacking and Lifting, Description and Operation)...
Other information:
Lincoln Corsair 2020-2026 Service Manual: Removal and Installation - Heated Rear Seat Module
Removal NOTE: The heated rear seat module is located under the LH (left hand) rear seat cushion substrate. Remove the heated rear seat module. Remove the pin-type retainer. Remove the heated rear seat module from the rear seat cushion substrate...
Lincoln Corsair 2020-2026 Owners Manual: What Is Phone As a Key. Phone as a Key Limitations. Programming Your Phone
What Is Phone As a Key (IF EQUIPPED) Phone as a Key allows you to use your phone in place of a passive key. You can use your phone for the following functions: Remote locking and unlocking. Passive entry and exit. Passive start and drive the vehicle...
Categories
- Manuals Home
- 1st Generation Lincoln Corsair Owners Manual
- 1st Generation Lincoln Corsair Service Manual
- Auto Hold (IF EQUIPPED)
- Overhaul - Main Control Valve Body
- Fuel Quality - Gasoline
- New on site
- Most important about car
Audio Unit
WARNING: Driving while distracted can result in loss of vehicle control, crash and injury. We strongly recommend that you use extreme caution when using any device that may take your focus off the road. Your primary responsibility is the safe operation of your vehicle. We recommend against the use of any hand-held device while driving and encourage the use of voice-operated systems when possible. Make sure you are aware of all applicable local laws that may affect the use of electronic devices while driving.