Lincoln Corsair: Automatic Transmission - 8-Speed Automatic Transmission – 8F35/8F40 / Removal and Installation - Roll Restrictor RH
Special Tool(s) /
General Equipment
Removal
-
With the vehicle in NEUTRAL, position it on a hoist.
Refer to: Jacking and Lifting - Overview (100-02 Jacking and Lifting, Description and Operation).
-
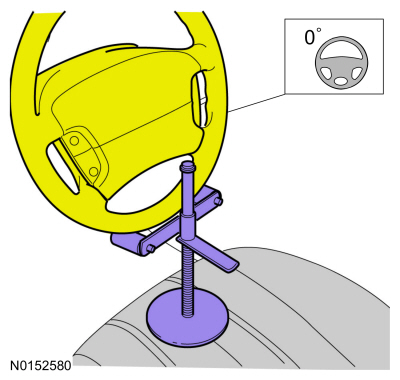
Using a holding device, hold the steering wheel in the straight-ahead position.
-
-
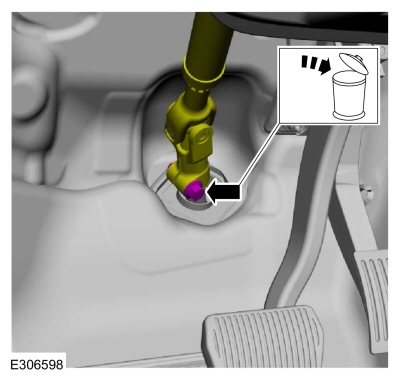
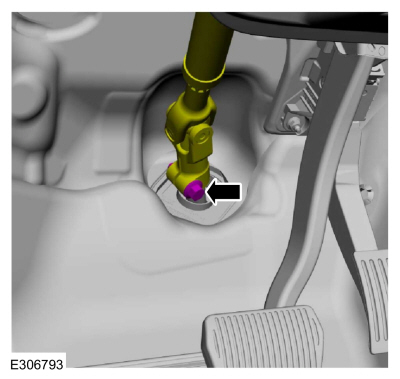
Remove the bolt and discard.
-
Position steering column shaft aside.
-
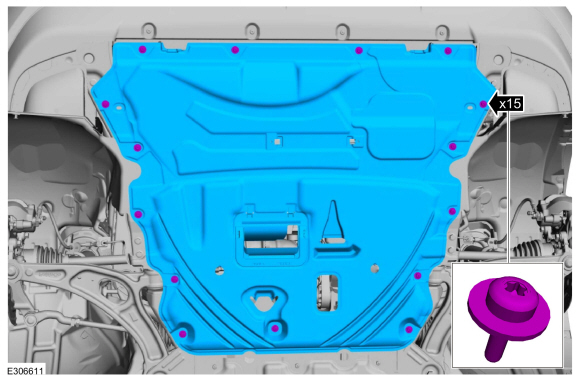
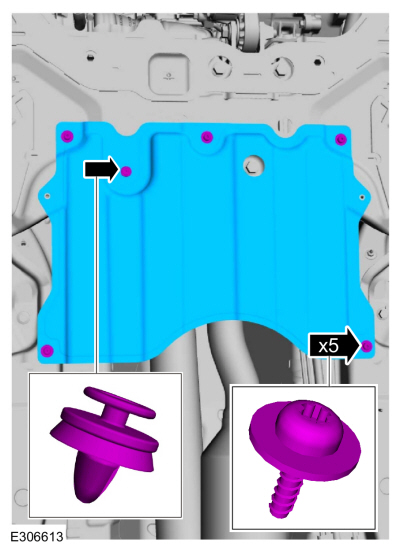
Remove the retainers and the underbody shield.
-
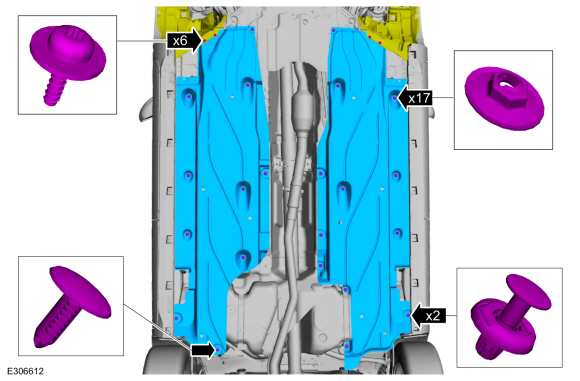
Remove the retainers and the underbody shields.
-
Remove the retainers and the underbody shield.
-
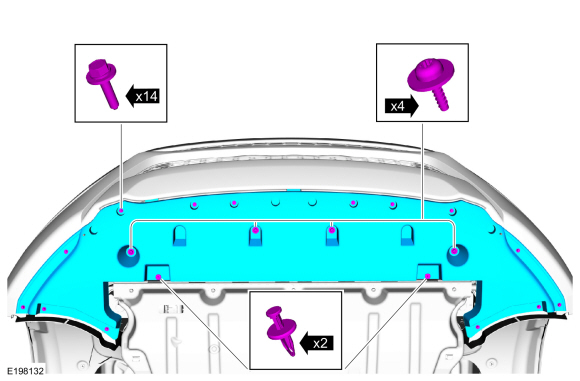
Remove the front under body shield.
-
Remove the nuts and the bracket.
-
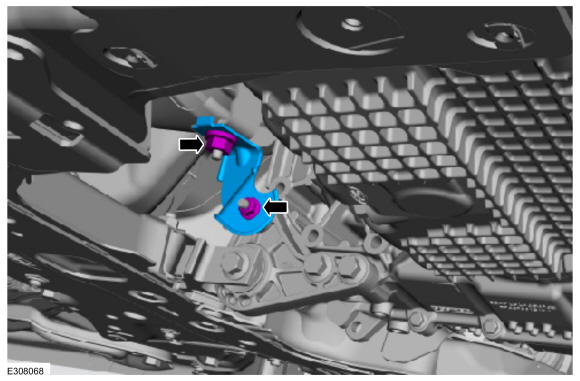
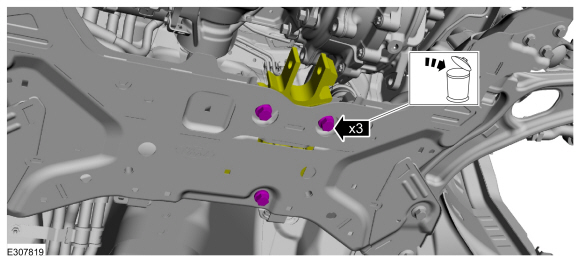
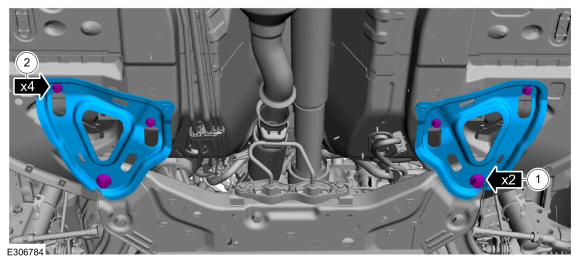
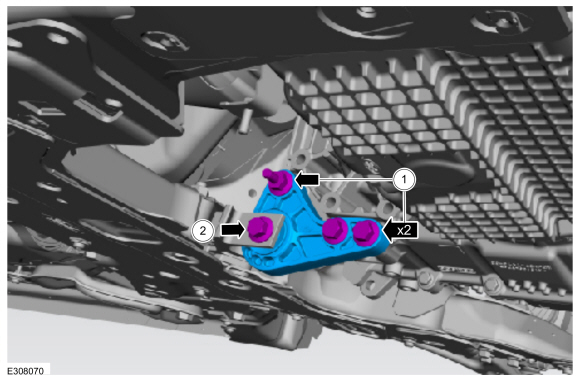
Remove and discard the roll restrictor bracket bolts and remove the bracket.
-
Remove and discard the roll restrictor bolts.
-
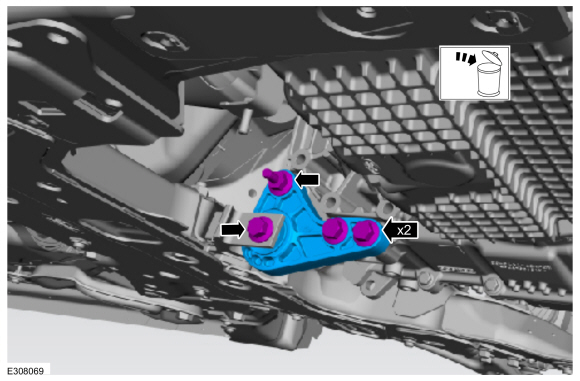
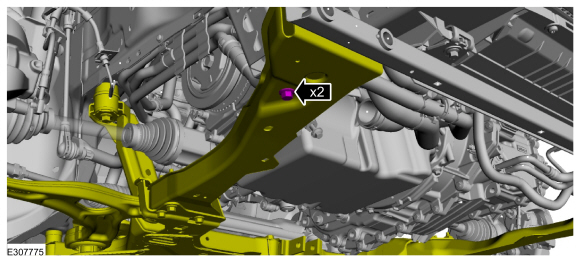
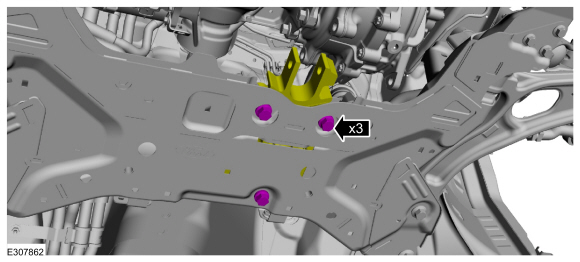
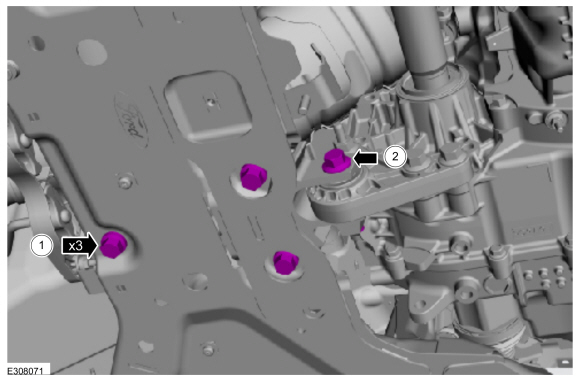
Remove the subframe support bracket bolts.
-
-
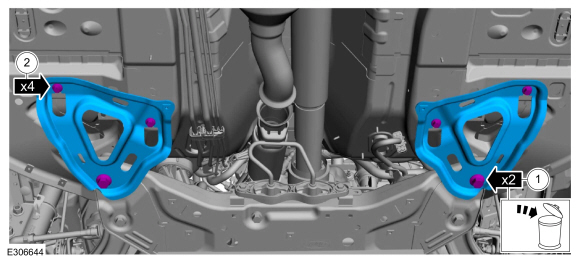
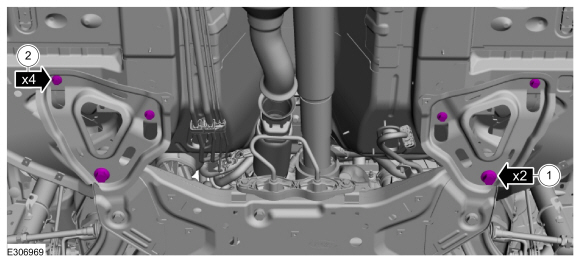
Remove and discard the rearward subframe bolts.
-
Remove the bolts and the subframe brackets.
-
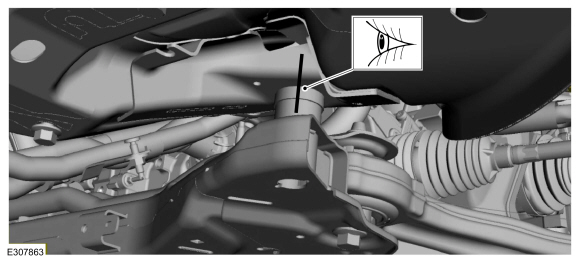
On both sides, index-mark the subframe to the body.
-
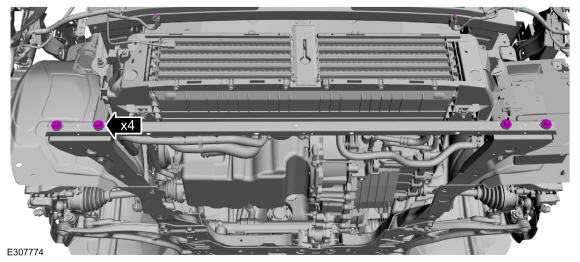
On both sides, remove the front subframe bolts.
-
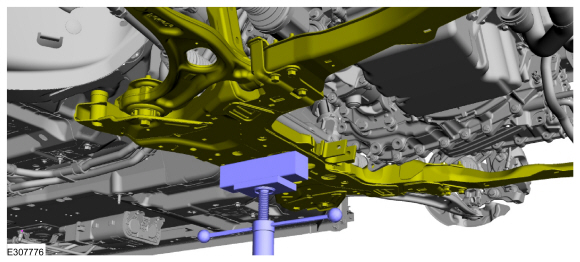
Support the subframe with a screw jack.
Use the General Equipment: Wooden Block
-
NOTE:
Do not remove the bolts.
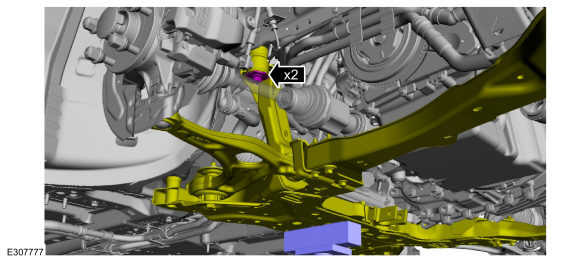
On both sides, loosen the subframe bolts.
-
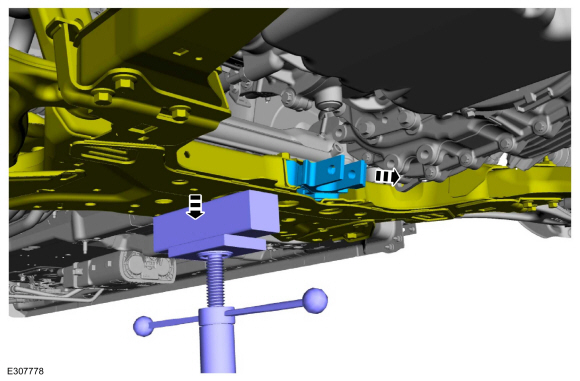
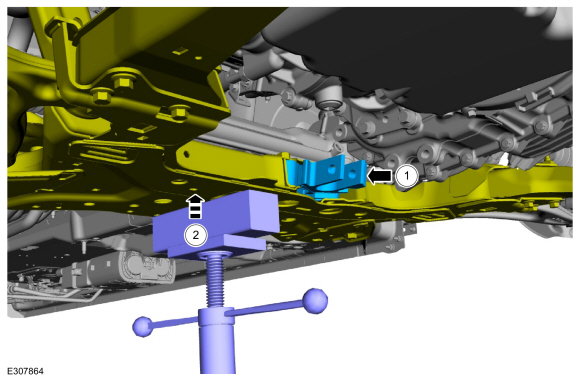
NOTE:
Lower the subframe far enough to remove the roll restrictor without interference from the transmission.
Using a screw jack, lower the subframe and remove the roll restrictor.
Use the General Equipment: Wooden Block
Installation
-
-
Install the roll restrictor.
-
Raise the subframe.
-
On both sides, install the front subframe bolts finger tight.
-
-
Install the subframe brackets and the new rearward subframe bolts finger tight.
-
Install the subframe bracket bolts finger tight.
-
On both sides, align index-mark made during removal.
-
On both sides, tighten the subframe bolts.
Torque:
85 lb.ft (115 Nm)
-
On both sides, tighten the front subframe bolts.
Torque:
85 lb.ft (115 Nm)
-
-
Tighten the bolts.
Torque:
Stage 1:
159 lb.ft (215 Nm)
Stage 2:
60°
-
Tighten the bolts.
Torque:
46 lb.ft (63 Nm)
-
Install the subframe support bracket bolts.
Torque:
22 lb.ft (30 Nm)
-
Install new roll restrictor bolts finger tight.
-
-
Install new roll restrictor bracket bolts and studbolt.
Torque:
129 lb.ft (175 Nm)
-
Install a new roll restrictor bolt finger tight.
-
-
Tighten the bolts.
Torque:
52 lb.ft (70 Nm)
-
Tighten the bolts.
Torque:
129 lb.ft (175 Nm)
-
Install the bracket and the nuts.
Torque:
35 lb.ft (47 Nm)
-
Install the front under body shield.
-
Install the underbody shield and the retainers.
-
Install the underbody shields and the retainers.
-
Install the underbody shield and the retainers.
-
Position steering column shaft and install a new bolt.
Torque:
46 lb.ft (63 Nm)
-
Remove the holding device.
Materials
Name
Specification
Petroleum Jelly
-
Removal
Remove the main control valve body.
Remove the bolt and the fluid transfer pipe...
Materials
Name
Specification
Motorcraft® MERCON® ULV Automatic Transmission FluidXT-12-QULV
WSS-M2C949-A, MERCON® ULV
Removal
NOTICE:
Failure to match the replacement solenoid service band to
the original solenoid can cause damage to the transmission or erratic
engagements and shifts...
Other information:
Overview
Driver Power Seat
The driver power seat is available with a 10 or 24-way power adjustable memory seat.
The driver power seat is controlled by the DSM located on the driver
seat track. PMI is required when a new DSM is installed. The DSM hard
stop/soft stops must be set/reset any time a new DSM , driver seat
track, horizontal motor, driver seat backrest or cushion extension
assemb..
Special Tool(s) /
General Equipment
Hose Clamp(s)
Hose Clamp Remover/Installer
Removal
Remove the battery tray.
WARNING:
When releasing the cooling system pressure, cover the coolant expansion tank cap with a thick cloth.
Loosen the pressure relief cap.
Disconnect the coolant control valve electrical connector and..

 Removal and Installation - Output Shaft Speed (OSS) Sensor
 Removal and Installation - Solenoid
 Select the settings option on
the
feature bar.
Select the settings option on
the
feature bar.