Lincoln Corsair: Glass, Frames and Mechanisms / Removal and Installation - Front Door Glass Top Run
Lincoln Corsair 2020-2024 Service Manual / Body and Paint / Body and Paint / Glass, Frames and Mechanisms / Removal and Installation - Front Door Glass Top Run
Removal
NOTE: LH (left-hand) side shown, RH (right-hand) side similar.
NOTE: Removal steps in this procedure may contain installation details.
-
Remove the front door window glass.
Refer to: Front Door Window Glass (501-11 Glass, Frames and Mechanisms, Removal and Installation).
-
Remove the front door outer belt moulding screw.
-
Release the pin-type retainer and position the front door glass top run aside.
-
Remove the front door outer belt moulding screw.
Torque: 12 lb.in (1.3 Nm)
-
Release the pin-type retainer and position the front door glass top run aside.
.jpg) |
-
Remove the screws and position the front door glass top run aside.
-
Release the pin-type retainer, position the front
door glass top run aside and remove the front door outer belt moulding
screw.
Torque: 12 lb.in (1.3 Nm)
-
Remove the front door glass top run screw.
Torque: 12 lb.in (1.3 Nm)
-
Release the pin-type retainer, position the front
door glass top run aside and remove the front door outer belt moulding
screw.
.jpg) |
-
Remove the front door outer belt moulding.
.jpg) |
-
Remove the front door glass top run screw.
-
Position the front door glass top run aside.
-
Remove the front door glass top run screw.
Torque: 12 lb.in (1.3 Nm)
-
Position the front door glass top run aside.
.jpg) |
-
Position aside the front door glass top run.
.jpg) |
-
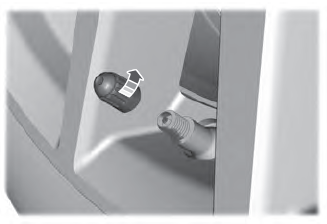
Remove the keyless entry keypad.
-
Release the clips.
-
Remove the keyless entry keypad.
-
Release the clips.
.jpg) |
-
Remove the front door glass top run screw.
Torque: 12 lb.in (1.3 Nm)
.jpg) |
-
Remove the front door glass top run.
-
Release the front door glass top run from the door run channel.
-
Release the front door glass top run from the door run channel.
-
Release the front door glass top run from the door run channel.
-
Remove the front door glass top run.
-
Release the front door glass top run from the door run channel.
.jpg) |
Installation
-
To install, reverse the removal procedure.
-
Carry out the power door window initialization.
Refer to: Power Door Window Initialization (501-11 Glass, Frames and Mechanisms, General Procedures).
 Removal and Installation - Front Door Glass Run and Bracket
Removal
NOTE:
LH (left-hand) side shown, RH (right-hand) side similar.
Remove the exterior front door handle reinforcement.
Refer to: Exterior Front Door Handle Reinforcement (501-14 Handles,
Locks, Latches and Entry Systems, Removal and Installation)...
 Removal and Installation - Front Door Window Glass
Special Tool(s) /
General Equipment
Punch
Removal
NOTE:
LH (left-hand) side shown, RH (right-hand) side similar.
Remove the front door trim panel...
Other information:
Lincoln Corsair 2020-2024 Service Manual: Description and Operation - Handles, Locks, Latches and Entry Systems - System Operation and Component Description
System Operation System Diagrams NOTE: The Phone As A Key feature can also be used to lock/unlock the vehicle. Refer to section 419-01C for information regarding this feature. Item Description 1 Liftgate Release Switch 2 RTM 3 Keyless Entry Keypad 4 GWM 5 RGTM 6 Liftgate Latch 7 Turn Signals 8 Horn 9 I..
Lincoln Corsair 2020-2024 Service Manual: Removal and Installation - Rear Halfshaft
Special Tool(s) / General Equipment 100-001 (T50T-100-A) Slide Hammer 205-832Remover, HalfshaftTKIT-2006C-FFMFLMTKIT-2006C-LMTKIT-2006C-ROW Removal NOTICE: Never pick up or hold the halfshaft by only the inner or outer Constant Velocity (CV) joint. Damage to the CV joint will occur. NOTICE: Never use a hammer to remove or install the halfshafts. Damage to the CV jo..
Categories
- Manuals Home
- 1st Generation Lincoln Corsair Owners Manual
- 1st Generation Lincoln Corsair Service Manual
- Refueling - Gasoline
- Capacities and Specifications - 2.0L
- Exterior Mirrors
- New on site
- Most important about car
Second Stage: Checking Tire Pressure
WARNING: If the tire does not inflate to the recommended tire pressure within 15 minutes, stop and call roadside assistance.
WARNING: The power plug may get hot after use and should be handled carefully when unplugging.
Check the air pressure of your tires as follows:
Copyright © 2024 www.licorsair.com