Lincoln Corsair: Engine - 2.0L EcoBoost (177kW/240PS) – MI4 / Disassembly and Assembly of Subassemblies - Piston
Lincoln Corsair 2020-2026 Service Manual / Powertrain / Engine / Engine - 2.0L EcoBoost (177kW/240PS) – MI4 / Disassembly and Assembly of Subassemblies - Piston
DISASSEMBLY
NOTE: If the piston and connecting rod are to be reinstalled, they must be assembled in the same orientation. Mark the piston orientation to the connecting rod reassembly.
-
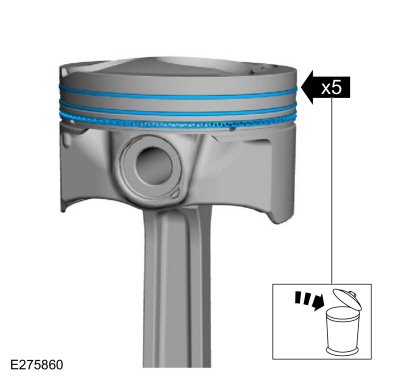
Remove the piston rings and discard.
 |
-
-
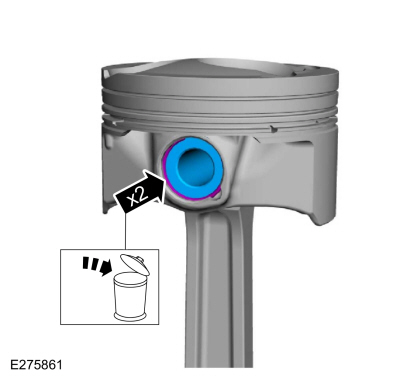
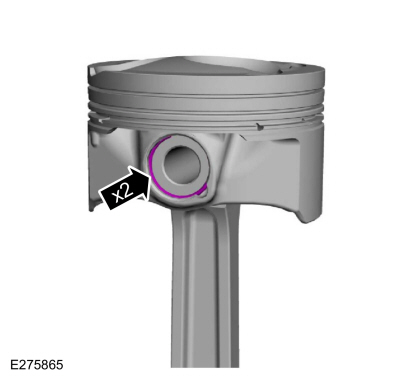
Remove the piston pin retainers and discard.
-
Remove the piston pin.
-
Remove the piston pin retainers and discard.
 |
-
NOTE: If the piston and connecting rod are to be reinstalled, they must be assembled in the same orientation. Mark the piston orientation to the connecting rod for reassembly.
Remove the piston from the connecting rod.
Refer to: Piston Inspection (303-00 Engine System - General Information, General Procedures).
 |
ASSEMBLY
-
NOTE: Align the piston-to-connecting rod orientation marks made during disassembly.
Install the piston to the connecting rod.
 |
-
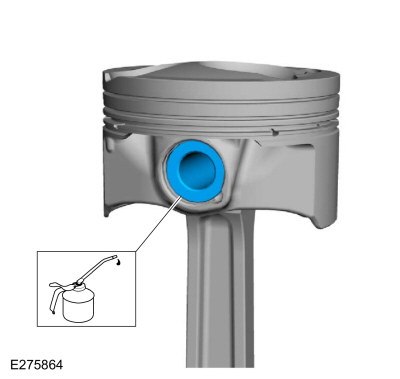
Lubricate with clean engine oil and install the piston pin.
 |
-
Install the piston pin retainers.
 |
-
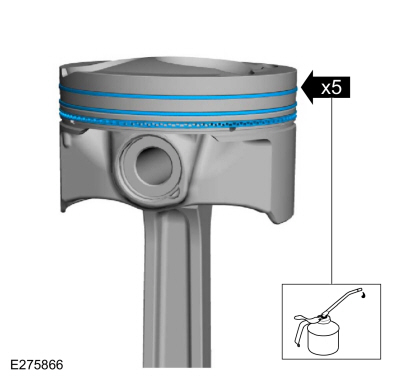
Lubricate with clean engine oil and install the piston rings.
 |
-
NOTE: Align the piston rings on the piston.
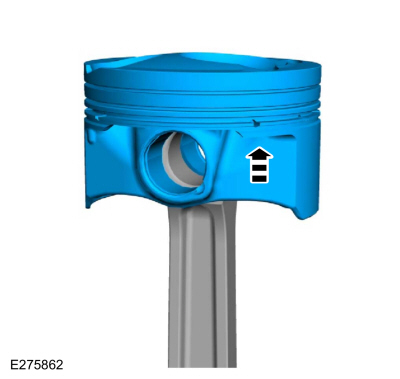
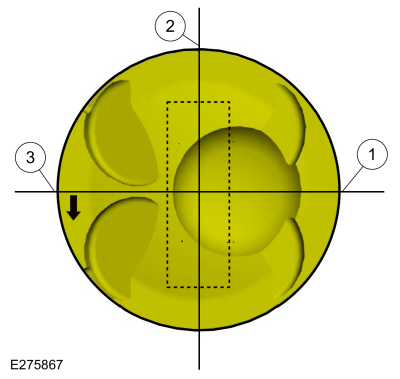
NOTE: Arrow indicates front of engine.
-
Upper oil control segment ring gap location.
-
Oil control spacer gap location.
-
Lower oil control segment ring gap location.
-
Upper oil control segment ring gap location.
 |

 Assembly - Engine
Special Tool(s) /
General Equipment
100-002
(TOOL-4201-C)
Holding Fixture with Dial Indicator Gauge
205-153
(T80T-4000-W)
Handle
303-096
(T74P-6150-A)
Installer, Camshaft Front Oil SealTKIT-2009TC-F
303-103
(T74P-6375-A)
Holding Tool, FlywheelT74P-77000-ATKIT-2009TC-F
303-1252Stretchy Belt Remover/ Installer ToolTKIT-2006UF-FLMTKIT-2006UF-ROW
303-1..
Other information:
Lincoln Corsair 2020-2026 Service Manual: Removal and Installation - Floor Console
Special Tool(s) / General Equipment Side Cutter Pliers Interior Trim Remover Removal NOTE: Removal steps in this procedure may contain installation details. Remove both front seats. Refer to: Front Seat (501-10A Front Seats, Removal and Installation). Release the clips and remove the floor console rear trim panel. Disconnect the electrical connect..
Lincoln Corsair 2020-2026 Service Manual: Removal and Installation - Rear Seat Backrest Cover
Special Tool(s) / General Equipment Interior Trim Remover Hog Ring Plier Removal WARNING: Seat backrest trim covers installed on seats equipped with seat side airbags cannot be repaired. A new trim cover must be installed. Cleaning is permissible. Failure to follow these instructions may result in the seat side airbag deploying incorrectly and increase the risk of s..
Categories
- Manuals Home
- 1st Generation Lincoln Corsair Owners Manual
- 1st Generation Lincoln Corsair Service Manual
- General Procedures - Brake Service Mode Activation and Deactivation
- Programming the Garage Door Opener to Your Garage Door Opener Motor
- Memory Function
- New on site
- Most important about car
Selecting a Drive Mode. DRIVE MODES
Selecting a Drive Mode
Note: Drive mode changes may not be available when the ignition is off.
Copyright © 2026 www.licorsair.com