Lincoln Corsair: Steering Column / Removal and Installation - Steering Wheel
Lincoln Corsair 2020-2026 Service Manual / Chassis / Steering System / Steering Column / Removal and Installation - Steering Wheel
Special Tool(s) / General Equipment
| Adhesive Tape |
Removal
NOTICE: To prevent damage to the clockspring, make sure the front wheels are in the straight-ahead position.
NOTE: Removal steps in this procedure may contain installation details.
-
Remove the driver airbag.
Refer to: Driver Airbag (501-20B Supplemental Restraint System, Removal and Installation).
-
-
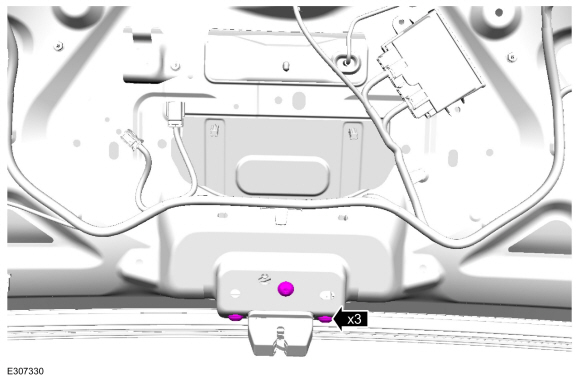
Disconnect the steering wheel electrical connectors.
-
Remove the steering wheel retainer and the steering wheel.
Torque: 35 lb.ft (48 Nm)
-
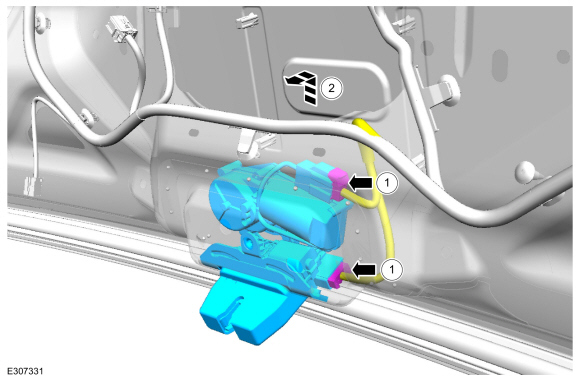
Disconnect the steering wheel electrical connectors.
 |
-
NOTE: Make sure the clockspring rotor does not rotate.
NOTE: Make sure the clockspring pins are not bent or damaged.
Tape the clockspring rotor to the outer housing to keep it from rotating.
Use the General Equipment: Adhesive Tape
 |
-
NOTE: This step is only necessary when installing a new component.
Remove the steering wheel multifunction switch.
Refer to: Steering Wheel Multifunction Switch (211-05 Steering Wheel and Column Electrical Components, Removal and Installation).
Installation
-
To install, reverse the removal procedure.
 Removal and Installation - Steering Column Shaft
Removal
NOTE:
Removal steps in this procedure may contain installation details.
NOTICE:
Do not allow the steering wheel to rotate while the
steering column shaft is disconnected or damage to the clockspring may
result...

Other information:
Lincoln Corsair 2020-2026 Owners Manual: Cruise Control Module
Argentina Brazil Djibouti Ghana Indonesia Jamaica Malaysia RALM/61A/0318/S(18-0852) Mauritania Moldova Morocco Pakistan Paraguay Serbia Singapore South Africa South Korea R-CMM-DLH-L2C0065TR Syria Taiwan, China Ukraine United Arab Emirates United States and Canada WARNING: Changes or modifications not expressively approved by the party responsible for compliance could void th..
Lincoln Corsair 2020-2026 Service Manual: Removal and Installation - Parking Brake Switch
Special Tool(s) / General Equipment Side Cutter Pliers Interior Trim Remover Removal NOTE: Removal steps in this procedure may contain installation details. Open the floor console stowage bin lid. Remove the bolt, detach the clips and remove the floor console LH side trim panel. Torque: 33 lb.in (3.7 Nm) ..
Categories
- Manuals Home
- 1st Generation Lincoln Corsair Owners Manual
- 1st Generation Lincoln Corsair Service Manual
- Auto-Start-Stop
- Overhaul - Main Control Valve Body
- Interior Lamps
- New on site
- Most important about car
360 Degree Camera Cameras
Locating the Rear View Camera

The rear view camera is on the tailgate.
Locating the Front View Camera
Copyright © 2026 www.licorsair.com