Lincoln Corsair: Exterior Trim and Ornamentation / Removal and Installation - Rocker Panel Moulding
Lincoln Corsair 2020-2026 Service Manual / Body and Paint / Body and Paint / Exterior Trim and Ornamentation / Removal and Installation - Rocker Panel Moulding
Special Tool(s) / General Equipment
| Interior Trim Remover |
Removal
NOTE: Removal steps in this procedure may contain installation details.
NOTE: LH side shown, RH side similar.
-
Remove the rear quarter panel moulding.
Refer to: Rear Quarter Panel Moulding (501-08 Exterior Trim and Ornamentation, Removal and Installation).
-
Remove the push pins, the screws and position the fender splash shield aside.
Torque: 22 lb.in (2.5 Nm)
.jpg) |
-
Remove the trim pins and postion the front fender moulding aside.
.jpg) |
-
-
Remove the push pins.
-
Remove the screw.
Torque: 17 lb.in (1.9 Nm)
-
Remove the push pins.
.jpg) |
-
Using a non-marring trim tool disengage the clip fasteners.
Use the General Equipment: Interior Trim Remover
.jpg) |
-
Remove retainer clips and rocker panel moulding.
.jpg) |
Installation
-
To install, reverse the removal procedure.
 Removal and Installation - Rear Spoiler
Special Tool(s) /
General Equipment
Interior Trim Remover
Removal
NOTE:
Removal steps in this procedure may contain installation details...
 Removal and Installation - Roof Rail
Removal
NOTE:
Removal steps in this procedure may contain installation details.
Lower the headliner.
Refer to: Headliner - Lowering (501-05 Interior Trim and Ornamentation, Removal and Installation)...
Other information:
Lincoln Corsair 2020-2026 Owners Manual: Getting the Services You Need
Warranty repairs to your vehicle must be performed by an authorized dealer. While any authorized dealer handling your vehicle line provides warranty service, we recommend you return to your selling authorized dealer who wants to ensure your continued satisfaction...
Lincoln Corsair 2020-2026 Service Manual: Removal and Installation - Wheel and Tire
Materials Name Specification Motorcraft® High Temperature Nickel Anti-Seize LubricantXL-2 - Removal With the vehicle in NEUTRAL, position it on a hoist. Refer to: Jacking and Lifting (100-02 Jacking and Lifting) . NOTICE: Do not use heat to loosen a seized wheel nut or damage to the wheel and wheel bearing can occur...
Categories
- Manuals Home
- 1st Generation Lincoln Corsair Owners Manual
- 1st Generation Lincoln Corsair Service Manual
- Capacities and Specifications - 2.0L
- Warning Lamps and Indicators
- General Procedures - Brake Service Mode Activation and Deactivation
- New on site
- Most important about car
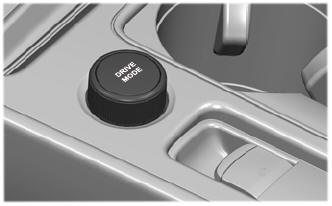
Selecting a Drive Mode. DRIVE MODES
Selecting a Drive Mode
Note: Drive mode changes may not be available when the ignition is off.
Copyright © 2026 www.licorsair.com