Lincoln Corsair: Interior Trim and Ornamentation / Removal and Installation - C-Pillar Trim Panel
Lincoln Corsair 2020-2026 Service Manual / Body and Paint / Body and Paint / Interior Trim and Ornamentation / Removal and Installation - C-Pillar Trim Panel
Special Tool(s) / General Equipment
| Interior Trim Remover |
Removal
NOTE: LH (left hand) shown, RH (right hand) similar.
NOTE: Removal steps in this procedure may contain installation details.
-
Remove the loadspace trim panel.
Refer to: Loadspace Trim Panel (501-05 Interior Trim and Ornamentation, Removal and Installation).
-
Remove the C-pillar trim panel bolt.
Torque: 22 lb.in (2.5 Nm)
.jpg) |
-
Release the C-pillar trim panel lower clip.
Use the General Equipment: Interior Trim Remover
.jpg) |
-
NOTICE: The C-pillar trim panel must be positioned downward to allow the upper clip to release correctly. Failure to follow this direction may cause damage to the C-pillar trim panel.
Slide the C-pillar trim panel down, aligning the clip to the slot in the sheet metal.
.jpg) |
-
Remove the C-pillar trim panel.
.jpg) |
Installation
-
To install, reverse the removal procedure.
-
Inspect and position the rear door weather strip lip so that it overlaps the top of the C-pillar trim panel.
.jpg) |
 Removal and Installation - B-Pillar Trim Panel
Special Tool(s) /
General Equipment
Interior Trim Remover
Removal
NOTE:
LH (left hand) shown, RH (right hand) similar.
Upper and lower B-pillar trim panels
Remove the following items:
Remove the front scuff plate trim panel...
 Removal and Installation - D-Pillar Trim Panel
Special Tool(s) /
General Equipment
Interior Trim Remover
Removal
NOTE:
LH (left hand) shown, RH (right hand) similar.
NOTE:
Rear seats removed for clarity...
Other information:
Lincoln Corsair 2020-2026 Service Manual: Specifications
General Specifications Item Specification Normal engine cranking speed (Average) 180-350 RPM Starting circuit maximum voltage drop (Engine at normal operating temperature) (Average) 1...
Lincoln Corsair 2020-2026 Service Manual: Removal and Installation - Lower Arm
Special Tool(s) / General Equipment Vehicle/Axle Stands Removal Remove the wheel and tire. Refer to: Wheel and Tire (204-04A Wheels and Tires, Removal and Installation). NOTICE: Take extra care when handling a compressed spring...
Categories
- Manuals Home
- 1st Generation Lincoln Corsair Owners Manual
- 1st Generation Lincoln Corsair Service Manual
- Interior Lamps
- Child Safety Locks
- Refueling - Gasoline
- New on site
- Most important about car
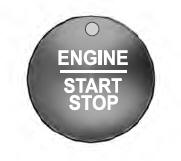
Keyless Starting
Note: The keyless starting system may not function if the key is close to metal objects or electronic devices such as cellular phones.
Note: A valid key must be located inside your vehicle to switch the ignition on and start the engine.
Ignition Modes

Copyright © 2026 www.licorsair.com
