Lincoln Corsair: Steering Wheel and Column Electrical Components / Diagnosis and Testing - Steering Wheel and Column Electrical Components
Diagnostic Trouble Code (DTC) Chart
Diagnostics in this manual assume a certain skill level and knowledge of Ford-specific diagnostic practices.
REFER to: Diagnostic Methods (100-00 General Information, Description and Operation).
Diagnostic Trouble Code Chart
| Module | DTC | Description | Action |
|---|---|---|---|
| BCM | B108A:01 | Start Button: General Electrical Failure | GO to Pinpoint Test A |
| BCM | B108A:24 | Start Button: Signal Stuck High | GO to Pinpoint Test A |
| BCM | B108A:9E | Start Button: Stuck On | GO to Pinpoint Test A |
| BCM | B1142:29 | Ignition Status 1: Signal Invalid | GO to Pinpoint Test A |
| BCM | B1240:11 | Start Button Mode Indicator: Circuit Short to Ground | GO to Pinpoint Test B |
| BCM | B1240:15 | Start Button Mode Indicator: Circuit Short to Battery or Open | GO to Pinpoint Test C |
| BCM | B130F:12 | Run Accessory Control: Circuit Short to Battery |
REFER to: Wipers and Washers (501-16 Wipers and Washers, Diagnosis and Testing). |
| BCM | B130F:14 | Run Accessory Control: Circuit Short to Ground or Open |
REFER to: Wipers and Washers (501-16 Wipers and Washers, Diagnosis and Testing). |
| BCM | B1310:12 | Run/Start Control: Circuit Short to Battery | GO to Pinpoint Test A |
| BCM | B1310:14 | Run/Start Control: Circuit Short to Ground or Open | GO to Pinpoint Test A |
| BCM | B1537:11 | Engine Stop-Start Button Backlight: Circuit Short To Ground |
REFER to: Interior Lighting (417-02 Interior Lighting, Diagnosis and Testing). |
| BCM | B1537:15 | Engine Stop-Start Button Backlight: Circuit Short To Battery or Open |
REFER to: Interior Lighting (417-02 Interior Lighting, Diagnosis and Testing). |
| SCCM | B112B:04 | Steering Wheel Module: System Internal Failure | GO to Pinpoint Test H |
| SCCM | B112B:44 | Steering Wheel Module: Data Memory Failure | GO to Pinpoint Test H |
| SCCM | B112B:45 | Steering Wheel Module: Program Memory Failure | GO to Pinpoint Test H |
| SCCM | B112B:46 | Steering Wheel Module: Calibration / Parameter Memory Failure | GO to Pinpoint Test H |
| SCCM | B112B:49 | Steering Wheel Module: Internal Electronic Failure | GO to Pinpoint Test H |
| SCCM | B135C:11 | Heater Element: Circuit Short To Ground | GO to Pinpoint Test G |
| SCCM | B135C:13 | Heater Element: Circuit Open | GO to Pinpoint Test G |
| SCCM | U0140:00 | Lost Communication With Body Control Module: No Sub Type Information | GO to Pinpoint Test I |
| SCCM | U0146:00 | Lost Communication With Gateway "A": No Sub Type Information | GO to Pinpoint Test I |
| SCCM | U0155:00 | Lost Communication With Instrument Panel Cluster Module: No Sub Type Information | GO to Pinpoint Test I |
| SCCM | U01B7:00 | Lost Communication With Switch Input Module "A": No Sub Type Information | GO to Pinpoint Test M |
| SCCM | U023A:00 | Lost Communication With Image Processing Module "A": No Sub Type Information | GO to Pinpoint Test I |
| SCCM | U0241:00 | Lost Communication With Headlamp Control Module: No Sub Type Information | GO to Pinpoint Test I |
| SCCM | U210A:11 | Temperature Sensor: Circuit Short To Ground | GO to Pinpoint Test G |
| SCCM | U210A:13 | Temperature Sensor: Circuit Open | GO to Pinpoint Test G |
| SCCM | U210A:29 | Temperature Sensor: Signal Invalid | GO to Pinpoint Test G |
| SCCM | U2200:00 | Control Module Configuration Memory Corrupt: No Sub Type Information | GO to Pinpoint Test I |
| SCCM | U3003:A2 | Battery Voltage: System Voltage Low | GO to Pinpoint Test E |
| SCCM | U3003:A3 | Battery Voltage: System Voltage High | GO to Pinpoint Test F |
| SIMA | U0100:00 | Lost Communication With ECM/PCM "A": No Sub Type Information | GO to Pinpoint Test I |
| SIMA | U0140:00 | Lost Communication With Body Control Module: No Sub Type Information | GO to Pinpoint Test I |
| SIMA | U0423:82 | Invalid Data Received from Instrument Panel Cluster Control Module: Alive / Sequence Counter Incorrect / Not Updated | GO to Pinpoint Test L |
| SIMA | U0554:82 | Invalid Data Received From Accessory Protocol Interface Module: Alive / Sequence Counter Incorrect / Not Updated | GO to Pinpoint Test L |
| SIMA | U2100:00 | Initial Configuration Not Complete: No Sub Type Information | GO to Pinpoint Test K |
| SIMA | U2101:00 | Control Module Configuration Incompatible: No Sub Type Information | GO to Pinpoint Test K |
| SIMA | U2200:00 | Control Module Configuration Memory Corrupt: No Sub Type Information | GO to Pinpoint Test K |
| SIMA | U3000:04 | Control Module: System Internal Failure | GO to Pinpoint Test J |
| SIMA | U3000:44 | Control Module: Data Memory Failure | GO to Pinpoint Test J |
| SIMA | U3000:45 | Control Module: Program Memory Failure | GO to Pinpoint Test J |
| SIMA | U3000:49 | Control Module: Internal Electronic Failure | GO to Pinpoint Test J |
| SIMA | U3003:16 | Battery Voltage: Circuit Voltage Below Threshold | GO to Pinpoint Test E |
| SIMA | U3003:17 | Battery Voltage: Circuit Above Threshold | GO to Pinpoint Test F |
Global Customer Symptom Code (GCSC) Chart
Diagnostics in this manual assume a certain skill level and knowledge of Ford-specific diagnostic practices.
REFER to: Diagnostic Methods (100-00 General Information, Description and Operation).
| Symptom | Action |
|---|---|
| Start/Run/Move > Starting > Push Button Start > Inoperative | GO to Pinpoint Test B |
| Stop/Steer/Ride > Steering/Steering Wheel > Performance > Inoperative | GO to Pinpoint Test G |
Symptom Charts
Symptom Chart: Ignition Switch - Push Button
Diagnostics in this manual assume a certain skill level and knowledge of Ford-specific diagnostic practices.
REFER to: Diagnostic Methods (100-00 General Information, Description and Operation).
Symptom Chart
| Condition | Actions |
|---|---|
| No power in ON |
|
| Key not detected displays in the message center |
|
| The ignition mode indicator is inoperative |
|
| The ignition mode indicator is always on |
|
| Vehicle starts with no IA keyfob present |
|
Symptom Chart: Heated Steering Wheel
Diagnostics in this manual assume a certain skill level and knowledge of Ford-specific diagnostic practices.
REFER to: Diagnostic Methods (100-00 General Information, Description and Operation).
NOTE: Due to the front facing seam of the vinyl /leather cover of the steering wheel and the placement of the heating element, Steering wheel heat will be minimal between the 3 and 9 oclock positions. This concern should be considered normal and characteristic of design.
Symptom Chart
| Condition | Actions |
|---|---|
| The heated steering wheel is inoperative or does not operate correctly |
|
Pinpoint Tests
|
Refer to Wiring Diagrams Cell 13 for schematic and connector information. Refer to Wiring Diagrams Cell 20 for schematic and connector information. Normal Operation and Fault Conditions
REFER to: Steering Wheel and Column Electrical Components - System
Operation and Component Description (211-05 Steering Wheel and Column
Electrical Components, Description and Operation). DTC Fault Trigger Conditions
Possible Sources
Visual Inspection and Pre-checks
NOTICE: Use the correct probe adapter(s) when making measurements. Failure to use the correct probe adapter(s) may damage the connector. |
|||||||||||||||||||||
| A1 CHECK THE VEHICLE BATTERY | |||||||||||||||||||||
Is the battery OK?
|
|||||||||||||||||||||
| A2 CHECK FOR BCM (BODY CONTROL MODULE) DTC (DIAGNOSTIC TROUBLE CODE) B1310:12 OR B1310:14 | |||||||||||||||||||||
Is DTC B1310:12 or B1310:14 present?
|
|||||||||||||||||||||
| A3 CHECK FOR IGNITION ON MODE | |||||||||||||||||||||
Does the ignition mode indicator flash on and off continuously?
|
|||||||||||||||||||||
| A4 CHECK FOR A PATS (PASSIVE ANTI-THEFT SYSTEM) CONCERN | |||||||||||||||||||||
Does No key detected display in the message center?
|
|||||||||||||||||||||
| A5 CHECK THE IGNITION SWITCH 1 (START_STOP_1) PID (PARAMETER IDENTIFICATION) | |||||||||||||||||||||
Does the PID change state when the START/STOP button is pressed and released?
|
|||||||||||||||||||||
| A6 CHECK THE START/STOP 1 INPUT CIRCUIT FOR A SHORT TO VOLTAGE | |||||||||||||||||||||
Is any voltage present?
|
|||||||||||||||||||||
| A7 CHECK THE START/STOP 1 INPUT CIRCUIT FOR A SHORT TO GROUND | |||||||||||||||||||||
Is the resistance greater than 10,000 ohms?
|
|||||||||||||||||||||
| A8 BYPASS THE PUSH BUTTON IGNITION SWITCH WHILE MONITORING THE IGNITION SWITCH 1 (START_STOP_1) PID (PARAMETER IDENTIFICATION) | |||||||||||||||||||||
Does the PID indicate the START/STOP button is pressed with the fused jumper wire connected?
|
|||||||||||||||||||||
| A9 CHECK FOR VOLTAGE TO THE IGNITION SWITCH | |||||||||||||||||||||
Is the voltage greater than 11 volts?
|
|||||||||||||||||||||
| A10 CHECK THE IGNITION SWITCH VOLTAGE SUPPLY CIRCUIT FOR AN OPEN | |||||||||||||||||||||
Is the resistance less than 3 ohms?
|
|||||||||||||||||||||
| A11 CHECK THE BCM (BODY CONTROL MODULE) START/STOP 1 INPUT CIRCUIT FOR AN OPEN | |||||||||||||||||||||
Is the resistance less than 3 ohms?
|
|||||||||||||||||||||
| A12 CHECK THE IGNITION SWITCH 2 (START_STOP_2) PID (PARAMETER IDENTIFICATION) | |||||||||||||||||||||
Does the PID change state when the START/STOP button is pressed and released?
|
|||||||||||||||||||||
| A13 CHECK THE BCM (BODY CONTROL MODULE) START/STOP 2 INPUT CIRCUIT FOR A SHORT TO GROUND | |||||||||||||||||||||
Is the resistance greater than 10,000 ohms?
|
|||||||||||||||||||||
| A14 BYPASS THE PUSH BUTTON IGNITION SWITCH WHILE MONITORING THE IGNITION SWITCH 2 (START_STOP_2) PID (PARAMETER IDENTIFICATION) | |||||||||||||||||||||
Does the PID indicate the START/STOP button is pressed with the fused jumper wire connected?
|
|||||||||||||||||||||
| A15 CHECK THE IGNITION SWITCH GROUND CIRCUIT FOR AN OPEN | |||||||||||||||||||||
Is the voltage greater than 11 volts?
|
|||||||||||||||||||||
| A16 CHECK THE BCM (BODY CONTROL MODULE) START/STOP 2 INPUT CIRCUIT FOR AN OPEN | |||||||||||||||||||||
Is the resistance less than 3 ohms?
|
|||||||||||||||||||||
| A17 CHECK THE BJB (BATTERY JUNCTION BOX) RUN/START RELAY CONTROL CIRCUIT FOR A FOR A SHORT TO GROUND | |||||||||||||||||||||
Is the resistance less than 3 ohms?
|
|||||||||||||||||||||
| A18 CHECK THE BJB (BATTERY JUNCTION BOX) RUN/START RELAY CONTROL CIRCUIT FOR A FOR A SHORT TO VOLTAGE | |||||||||||||||||||||
Is any voltage present?
|
|||||||||||||||||||||
| A19 CHECK THE BJB (BATTERY JUNCTION BOX) RUN/START RELAY CONTROL CIRCUIT FOR A FOR AN OPEN | |||||||||||||||||||||
Is the resistance less than 3 ohms?
|
|||||||||||||||||||||
| A20 CARRY OUT A NETWORK TEST | |||||||||||||||||||||
Do the IPC and the BCM pass the network test?
|
|||||||||||||||||||||
| A21 CHECK FOR CORRECT BCM (BODY CONTROL MODULE) OPERATION | |||||||||||||||||||||
Is the concern still present?
|


|
Refer to Wiring Diagrams Cell 20 for schematic and connector information. Normal Operation and Fault Conditions
REFER to: Steering Wheel and Column Electrical Components - System
Operation and Component Description (211-05 Steering Wheel and Column
Electrical Components, Description and Operation). DTC Fault Trigger Conditions
Possible Sources
NOTICE: Use the correct probe adapter(s) when making measurements. Failure to use the correct probe adapter(s) may damage the connector. |
||||||||||
| B1 CHECK FOR VOLTAGE TO THE IGNITION MODE INDICATOR | ||||||||||
Is the voltage greater than 11 volts?
|
||||||||||
| B2 CHECK THE IGNITION MODE INDICATOR VOLTAGE CIRCUIT FOR A SHORT TO GROUND | ||||||||||
Is the resistance greater than 10,000 ohms?
|
||||||||||
| B3 CHECK THE IGNITION MODE INDICATOR VOLTAGE CIRCUIT FOR AN OPEN | ||||||||||
Is the resistance less than 3 ohms?
|
||||||||||
| B4 CHECK THE IGNITION MODE INDICATOR GROUND CIRCUIT FOR AN OPEN | ||||||||||
Is the voltage greater than 11 volts?
|
||||||||||
| B5 CHECK FOR CORRECT BCM (BODY CONTROL MODULE) OPERATION | ||||||||||
Is the concern still present?
|
|
Refer to Wiring Diagrams Cell 20 for schematic and connector information. Normal Operation and Fault Conditions
REFER to: Steering Wheel and Column Electrical Components - System
Operation and Component Description (211-05 Steering Wheel and Column
Electrical Components, Description and Operation). DTC Fault Trigger Conditions
Possible Sources
NOTICE: Use the correct probe adapter(s) when making measurements. Failure to use the correct probe adapter(s) may damage the connector. |
||||||||||
| C1 ISOLATE THE BCM (BODY CONTROL MODULE) | ||||||||||
Does the ignition mode indicator continue to illuminate?
|
||||||||||
| C2 CHECK THE IGNITION MODE INDICATOR CIRCUIT FOR A SHORT TO VOLTAGE | ||||||||||
Is any voltage present?
|
||||||||||
| C3 CHECK FOR CORRECT BCM (BODY CONTROL MODULE) OPERATION | ||||||||||
Is the concern still present?
|
|
Refer to Wiring Diagrams Cell 20 for schematic and connector information. Normal Operation and Fault Conditions
REFER to: Steering Wheel and Column Electrical Components - System
Operation and Component Description (211-05 Steering Wheel and Column
Electrical Components, Description and Operation). Possible Sources
|
||||
| D1 CHECK FOR BCM (BODY CONTROL MODULE) OR IPC (INSTRUMENT PANEL CLUSTER) DIAGNOSTIC TROUBLE CODES (DTCS) | ||||
Are any BCM or IPC Diagnostic Trouble Codes (DTCs) present?
|
||||
| D2 VERIFY THE PRNDL "P" ILLUMINATES WHEN SHIFTED TO PARK. | ||||
Is the P illuminated?
|
||||
| D3 CHECK FOR CORRECT BCM (BODY CONTROL MODULE) OPERATION | ||||
Is the concern still present?
|
|
Refer to Wiring Diagrams Cell 13 for schematic and connector information. Normal Operation and Fault Conditions The SCCM continuously monitors input voltage for correct operation.
If voltage outside of defined limits is detected by the SCCM , the
applicable DTC sets. DTC
U3003:A2 can set if the vehicle battery has been discharged. The
vehicle battery may become discharged due to excessive load(s) on the
charging system from aftermarket accessories or if the vehicle has been
left unattended with the accessories on.REFER to: Steering Wheel and
Column Electrical Components - System Operation and Component
Description (211-05 Steering Wheel and Column Electrical Components,
Description and Operation). DTC Fault Trigger Conditions
Possible Sources
Visual Inspection and Pre-checks
NOTICE: Use the correct probe adapter(s) when making measurements. Failure to use the correct probe adapter(s) may damage the connector. |
||||||||||||||||
| E1 CHECK FOR SCCM (STEERING COLUMN CONTROL MODULE) OR SIMA (SWITCH INPUT MODULE A) DIAGNOSTIC TROUBLE CODES (DTCS) | ||||||||||||||||
Is DTC U3003:A2 or U3003:16 still present?
|
||||||||||||||||
| E2 CHECK FOR CHARGING SYSTEM DIAGNOSTIC TROUBLE CODES (DTCS) IN THE PCM (POWERTRAIN CONTROL MODULE) | ||||||||||||||||
Are any charging system Diagnostic Trouble Codes (DTCs) present in the PCM ?
|
||||||||||||||||
| E3 CHECK THE BATTERY CONDITION AND STATE OF CHARGE | ||||||||||||||||
Is the battery OK?
|
||||||||||||||||
| E4 CHECK THE SUSPECT MODULE VOLTAGE SUPPLY CIRCUIT FOR HIGH RESISTANCE | ||||||||||||||||
Is the voltage within 0.2 volt of the recorded battery voltage?
|
||||||||||||||||
| E5 CHECK THE SCCM (STEERING COLUMN CONTROL MODULE) OR SIMA (SWITCH INPUT MODULE A) GROUND CIRCUIT FOR HIGH RESISTANCE | ||||||||||||||||
Is the resistance less than 3 ohms?
|
||||||||||||||||
| E6 CHECK FOR CORRECT SCCM (STEERING COLUMN CONTROL MODULE) OPERATION | ||||||||||||||||
Is the concern still present?
|
||||||||||||||||
| E7 CHECK FOR CORRECT SIMA (SWITCH INPUT MODULE A) OPERATION | ||||||||||||||||
Is the concern still present?
|
|
Refer to Wiring Diagrams Cell 13 for schematic and connector information. Normal Operation and Fault Conditions The SCCM continuously monitors input voltage for correct operation.
If voltage outside of defined limits is detected by the SCCM , the
applicable DTC sets. DTC U3003:A3 can set if the vehicle has been
recently jump started or the vehicle battery has been recently
charged.REFER to: Steering Wheel and Column Electrical Components -
System Operation and Component Description (211-05 Steering Wheel and
Column Electrical Components, Description and Operation). DTC Fault Trigger Conditions
Possible Sources
|
|||||||||
| F1 CHECK FOR HIGH BATTERY VOLTAGE AND/OR CHARGING SYSTEM DTC (DIAGNOSTIC TROUBLE CODE) IN THE PCM (POWERTRAIN CONTROL MODULE) | |||||||||
Are any voltage and/or charging system Diagnostic Trouble Codes (DTCs) present?
|
|||||||||
| F2 CHECK THE BATTERY VOLTAGE | |||||||||
Does the battery voltage rise to 16.5 volts or higher?
|
|||||||||
| F3 RECHECK FOR SCCM (STEERING COLUMN CONTROL MODULE) OR SIMA (SWITCH INPUT MODULE A) DTC (DIAGNOSTIC TROUBLE CODE) U3003:A3 OR U3003:17 | |||||||||
Is DTC U3003:A3 or U3003:17 still present?
|
|||||||||
| F4 CHECK FOR CORRECT SCCM (STEERING COLUMN CONTROL MODULE) OPERATION | |||||||||
Is the concern still present?
|
|||||||||
| F5 CHECK FOR CORRECT SIMA (SWITCH INPUT MODULE A) OPERATION | |||||||||
Is the concern still present?
|
|
Refer to Wiring Diagrams Cell 128 for schematic and connector information. Normal Operation and Fault Conditions
REFER to: Steering Wheel and Column Electrical Components - System
Operation and Component Description (211-05 Steering Wheel and Column
Electrical Components, Description and Operation). DTC Fault Trigger Conditions
Possible Sources
Visual Inspection and Pre-checks
NOTICE: Use the correct probe adapter(s) when making measurements. Failure to use the correct probe adapter(s) may damage the connector. NOTE: Due to the front facing seam of the vinyl /leather cover of the steering wheel and the placement of the heating element, Steering wheel heat will be minimal between the 3 and 9 oclock positions. This concern should be considered normal and characteristic of design. |
||||||||||||||||||||||||||
| G1 CHECK FOR COMMUNICATION TO THE SCCM | ||||||||||||||||||||||||||
Does the SCCM pass the network test?
|
||||||||||||||||||||||||||
| G2 CHECK FOR SYSTEM VOLTAGE DTCS | ||||||||||||||||||||||||||
Are any charging system DTCs present?
|
||||||||||||||||||||||||||
| G3 CHECK THE SCCM VOLTAGE FEED CIRCUIT | ||||||||||||||||||||||||||
Is the voltage above 11 volts?
|
||||||||||||||||||||||||||
| G4 CHECK THE SCCM GROUND CIRCUIT | ||||||||||||||||||||||||||
Is the resistance less than 3 ohms?
|
||||||||||||||||||||||||||
| G5 CHECK THE RESISTANCE OF THE HEATED STEERING WHEEL HEATER ELEMENT | ||||||||||||||||||||||||||
Is the resistance between 1.6 and 3.1 ohms?
|
||||||||||||||||||||||||||
| G6 CHECK THE HEATER ELEMENT TEMPERATURE SENSOR AND CIRCUIT RESISTANCE | ||||||||||||||||||||||||||
Is the resistance within the specified value for the current temperature of the steering wheel?
|
||||||||||||||||||||||||||
| G7 CHECK THE HEATER ELEMENT TEMPERATURE SENSOR FOR A SHORT TO GROUND | ||||||||||||||||||||||||||
Is the resistance less than 3 ohms?
|
||||||||||||||||||||||||||
| G8 CHECK THE SCCM HEATED STEERING WHEEL SUPPLIED VOLTAGE CIRCUIT | ||||||||||||||||||||||||||
Is the voltage greater than 11 volts?
|
||||||||||||||||||||||||||
| G9 CHECK THE SCCM HEATED STEERING WHEEL GROUND CIRCUIT | ||||||||||||||||||||||||||
Is the resistance less than 3 ohms?
|
||||||||||||||||||||||||||
| G10 CHECK FOR CORRECT SCCM OPERATION | ||||||||||||||||||||||||||
Is the concern still present?
|
|
Normal Operation and Fault Conditions
REFER to: Steering Wheel and Column Electrical Components - System
Operation and Component Description (211-05 Steering Wheel and Column
Electrical Components, Description and Operation). DTC Fault Trigger Conditions
Possible Sources
|
||||||||||||||||||
| H1 CHECK FOR DTCS B112B:04, B112B:44, B112B:45, B112B:46 OR B112B:49 | ||||||||||||||||||
Are DTCs B112B:04, B112B:44, B112B:45, B112B:46 or B112B:49 present?
|
|
Normal Operation and Fault Conditions
REFER to: Steering Wheel and Column Electrical Components - System
Operation and Component Description (211-05 Steering Wheel and Column
Electrical Components, Description and Operation). DTC Fault Trigger Conditions
Possible Sources
|
||||||||||||||||||||||||
| I1 U0100:00, U0140:00, U0146:00, U0155:00, U023A:00, U0241:00 OR U2200:00 | ||||||||||||||||||||||||
Does the BCM , GWM , IPMA , HCM , IPC , SIMA or the SCCM pass the Network Test?
|
||||||||||||||||||||||||
| I2 CHECK THE SCCM (STEERING COLUMN CONTROL MODULE) OR SIMA (SWITCH INPUT MODULE A) DIAGNOSTIC TROUBLE CODES (DTCS) | ||||||||||||||||||||||||
Are DTC U0100:00, U0140:00, U0146:00, U0155:00, U023A:00, U0241:00 or U2200:00 retrieved again?
|
||||||||||||||||||||||||
| I3 REVIEW THE RECORDED DIAGNOSTIC TROUBLE CODES (DTCS) FROM THE SCCM (STEERING COLUMN CONTROL MODULE) OR SIMA (SWITCH INPUT MODULE A) SELF-TEST | ||||||||||||||||||||||||
Are any non network DTCs present in the SCCM or SIMA ?
|
||||||||||||||||||||||||
| I4 CHECK FOR DIAGNOSTIC TROUBLE CODES (DTCS) IN THE GWM (GATEWAY MODULE A) | ||||||||||||||||||||||||
Are any Diagnostic Trouble Codes (DTCs) present in the GWM ?
|
||||||||||||||||||||||||
| I5 U0100:00 CHECK FOR DIAGNOSTIC TROUBLE CODES (DTCS) IN THE PCM (POWERTRAIN CONTROL MODULE) | ||||||||||||||||||||||||
Are any Diagnostic Trouble Codes (DTCs) present in the PCM ?
|
||||||||||||||||||||||||
| I6 U0140:00 CHECK FOR DIAGNOSTIC TROUBLE CODES (DTCS) IN THE BCM (BODY CONTROL MODULE) | ||||||||||||||||||||||||
Are any Diagnostic Trouble Codes (DTCs) present in the BCM ?
|
||||||||||||||||||||||||
| I7 U0146:00 CHECK FOR DIAGNOSTIC TROUBLE CODES (DTCS) IN THE GWM (GATEWAY MODULE A) | ||||||||||||||||||||||||
Are any Diagnostic Trouble Codes (DTCs) present in the GWM ?
|
||||||||||||||||||||||||
| I8 U0155:00 CHECK FOR DIAGNOSTIC TROUBLE CODES (DTCS) IN THE IPC (INSTRUMENT PANEL CLUSTER) | ||||||||||||||||||||||||
Are any Diagnostic Trouble Codes (DTCs) present in the IPC ?
|
||||||||||||||||||||||||
| I9 U023A:00 CHECK FOR DIAGNOSTIC TROUBLE CODES (DTCS) IN THE IPMA (IMAGE PROCESSING MODULE A) | ||||||||||||||||||||||||
Are any Diagnostic Trouble Codes (DTCs) present in the IPMA ?
|
||||||||||||||||||||||||
| I10 CONFIRM THE DTC (DIAGNOSTIC TROUBLE CODE) U2200:00 RESETS | ||||||||||||||||||||||||
Is DTC U2200:00 still present?
|
||||||||||||||||||||||||
| I11 INSTALL SCCM (STEERING COLUMN CONTROL MODULE) PMI (PROGRAMMABLE MODULE INSTALLATION) | ||||||||||||||||||||||||
Is DTC U2200:00 still present?
|
||||||||||||||||||||||||
| I12 CHECK FOR OTHER CAUSES OF COMMUNICATION NETWORK CONCERN | ||||||||||||||||||||||||
|
NOTE: If new modules were installed prior to the DTC being set, the module configuration can be incorrectly set during the PMI or the PMI may not have been carried out.
Is the observable symptom still present?
|
||||||||||||||||||||||||
| I13 CHECK FOR CORRECT SUSPECT MODULE OPERATION | ||||||||||||||||||||||||
Is the concern still present?
|

 VIN required to access Guided Routine (PCM)
|
DTC Fault Trigger Conditions
Possible Sources
|
|||||||||||||||
| J1 CHECK FOR DTCS U3000:04, U3000:44, U3000:45, U3000:49 | |||||||||||||||
Are DTCs U3000:04, U3000:44, U3000:45, U3000:49 present?
|
|
DTC Fault Trigger Conditions
Possible Sources
|
||||||||||||
| K1 U2100:00, U2101:00, U2200:00, | ||||||||||||
Does the U2100:00, U2101:00 or U2200:00 return?
|
|
DTC Fault Trigger Conditions
Possible Sources
|
|||||||||
| L1 U0423:82, U0544:82 | |||||||||
Are any Diagnostic Trouble Codes (DTCs) present?
|
|
DTC Fault Trigger Conditions
Possible Sources
|
|||||||||||||
| M1 CHECK FOR SCCM (STEERING COLUMN CONTROL MODULE) DIAGNOSTIC TROUBLE CODES (DTCS) | |||||||||||||
Is DTC U01B7:00 the only DTC present?
|
|||||||||||||
| M2 CHECK THE SIMA (SWITCH INPUT MODULE A) VOLTAGE SUPPLY CIRCUIT FOR AN OPEN | |||||||||||||
|
Is the voltage greater than 11 volts?
|
|||||||||||||
| M3 CHECK THE SIMA (SWITCH INPUT MODULE A) HARNESS VOLTAGE SUPPLY CIRCUIT FOR AN OPEN | |||||||||||||
Is the voltage greater than 11 volts?
|
|||||||||||||
| M4 CHECK THE CLOCKSPRING VOLTAGE SUPPLY CIRCUIT FOR AN OPEN | |||||||||||||
Is the resistance less than 3 ohms?
|
|||||||||||||
| M5 CHECK THE SIMA (SWITCH INPUT MODULE A) GROUND CIRCUIT FOR AN OPEN | |||||||||||||
Is the voltage greater than 11 volts?
|
|||||||||||||
| M6 CHECK THE SIMA (SWITCH INPUT MODULE A) HARNESS GROUND CIRCUIT AT THE CLOCKSPRING | |||||||||||||
Is the resistance less than 3 ohms?
|
|||||||||||||
| M7 CHECK THE CLOCKSPRING GROUND CIRCUIT FOR AN OPEN | |||||||||||||
Is the resistance less than 3 ohms?
|
|||||||||||||
| M8 CHECK THE CAN (CONTROLLER AREA NETWORK) CIRCUITS BETWEEN THE SIMA (SWITCH INPUT MODULE A) AND THE LOWER CLOCKSPRING FOR AN OPEN | |||||||||||||
Are the resistances less than 3 ohms?
|
|||||||||||||
| M9 CHECK THE CLOCKSPRING CAN (CONTROLLER AREA NETWORK) CIRCUITS FOR AN OPEN | |||||||||||||
Are the resistances less than 3 ohms?
|
|||||||||||||
| M10 CHECK FOR CORRECT SIMA (SWITCH INPUT MODULE A) OPERATION | |||||||||||||
Is the concern still present?
|
 WARNING:
Turn the ignition OFF and wait one minute to deplete
the backup power supply. Failure to follow this instruction may result
in serious personal injury or death in the event of an accidental
deployment.
WARNING:
Turn the ignition OFF and wait one minute to deplete
the backup power supply. Failure to follow this instruction may result
in serious personal injury or death in the event of an accidental
deployment.

 Removal and Installation - Ignition Switch - Vehicles With: Push Button Start
Special Tool(s) /
General Equipment
Interior Trim Remover
Removal
NOTE:
Removal steps in this procedure may contain installation details...
Other information:
Lincoln Corsair 2020-2026 Owners Manual: Adaptive Cruise Control Precautions
Vehicles With: Adaptive Cruise Control With Lane Centering Adaptive cruise control precautions apply to lane centering unless stated otherwise or contradicted by a lane centering precaution. WARNING: Do not use the system when towing a trailer. Failure to follow this instruction could result in the loss of control of your vehicle, personal injury or death...
Lincoln Corsair 2020-2026 Service Manual: Removal and Installation - Steering Gear Boot
Special Tool(s) / General Equipment Boot Clamp Pliers Materials Name Specification Motorcraft® Premium Long-Life GreaseXG-1-E1 ESA-M1C75-B Removal NOTE: Left hand (LH) side shown, right (RH hand side ) similar. Remove the tie rod end...
Categories
- Manuals Home
- 1st Generation Lincoln Corsair Owners Manual
- 1st Generation Lincoln Corsair Service Manual
- Memory Function
- Auto-Start-Stop
- Capacities and Specifications - 2.0L
- New on site
- Most important about car
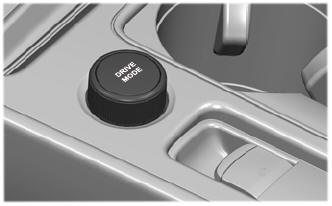
Selecting a Drive Mode. DRIVE MODES
Selecting a Drive Mode
Note: Drive mode changes may not be available when the ignition is off.