Lincoln Corsair: Interior Trim and Ornamentation / Removal and Installation - Rear Door Trim Panel
Lincoln Corsair 2020-2024 Service Manual / Body and Paint / Body and Paint / Interior Trim and Ornamentation / Removal and Installation - Rear Door Trim Panel
Special Tool(s) / General Equipment
| Pick Hook | |
| Interior Trim Remover |
Removal
NOTE: LH (left hand) shown, RH (right hand) similar.
NOTE: Removal steps in this procedure may contain installation details.
-
Release the clips and remove the interior rear door handle bolt cover.
Use the General Equipment: Pick Hook
.jpg) |
-
Remove the interior rear door handle bolt.
Torque: 17 lb.in (1.9 Nm)
.jpg) |
-
Remove the rear door window control switch.
Refer to: Rear Door Window Control Switch (501-11 Glass, Frames and Mechanisms, Removal and Installation).
-
Remove the rear door trim panel bolt.
Torque: 22 lb.in (2.5 Nm)
.jpg) |
-
Release the tab and remove the rear door trim panel bolt cover.
Use the General Equipment: Pick Hook
.jpg) |
-
Remove the rear door trim panel bolt.
Torque: 8 lb.in (0.9 Nm)
.jpg) |
-
Remove the rear door trim panel lower bolts.
Torque: 13 lb.in (1.5 Nm)
.jpg) |
-
Release the rear door trim panel clips.
Use the General Equipment: Interior Trim Remover
.jpg) |
-
Remove the rear door trim panel.
-
Release the tabs and position the interior rear door cable aside.
-
If equipped.
Disconnect the rear door tweeter speaker electrical connector.
-
Disconnect the rear door lock indicator electrical connector.
-
Release the tabs and position the interior rear door cable aside.
.jpg) |
Installation
-
NOTE: Transfer parts as necessary.
To install, reverse the removal procedure.
 Removal and Installation - Loadspace Trim Panel
Special Tool(s) /
General Equipment
Interior Trim Remover
Removal
NOTE:
Left hand (LH) shown, right hand (RH) similar.
NOTE:
Removal steps in this procedure may contain installation details...
 Removal and Installation - Rear Scuff Plate Trim Panel
Special Tool(s) /
General Equipment
Interior Trim Remover
Removal
Release the clips and remove the rear scuff plate trim panel.
Use the General Equipment: Interior Trim Remover
Installation
To install, reverse the removal procedure...
Other information:
Lincoln Corsair 2020-2024 Owners Manual: Fuel Quality - Gasoline
Choosing the Right Fuel Your vehicle is designed to operate on regular unleaded gasoline with a minimum pump (R+M)/2 octane rating of 87. Some fuel stations, particularly those in high altitude areas, offer fuels posted as regular unleaded gasoline with an octane rating below 87...
Lincoln Corsair 2020-2024 Service Manual: Diagnosis and Testing - Noise, Vibration and Harshness (NVH)
Special Tool(s) Vehicle Communication & Measurement Module (VCMM™) Base Kit 164-R9822 / 164-R9823 EngineEAR107-R2100Chassis EarsJSP97170 Squeak And Rattle Kit164-R4900 Ultrasonic Diagnostic ToolTRATP-9367 Diagnostic Theory The shortest route to an accurate diagnosis results from: System knowledge, including comparison with a..
Categories
- Manuals Home
- 1st Generation Lincoln Corsair Owners Manual
- 1st Generation Lincoln Corsair Service Manual
- Changing a Road Wheel
- Refueling - Gasoline
- Memory Function
- New on site
- Most important about car
360 Degree Camera Cameras
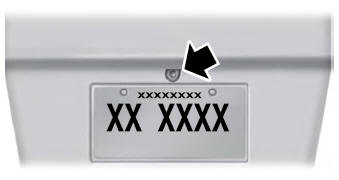
Locating the Rear View Camera

The rear view camera is on the tailgate.
Locating the Front View Camera
Copyright © 2024 www.licorsair.com
