Lincoln Corsair: Handles, Locks, Latches and Entry Systems / Removal and Installation - Exterior Rear Door Handle Reinforcement
Lincoln Corsair 2020-2024 Service Manual / Body and Paint / Body and Paint / Handles, Locks, Latches and Entry Systems / Removal and Installation - Exterior Rear Door Handle Reinforcement
Removal
NOTE: LH (left-hand) side shown, RH (right-hand) side similar.
-
Remove the rear door latch.
Refer to: Rear Door Latch (501-14 Handles, Locks, Latches and Entry Systems, Removal and Installation).
-
NOTE: This step is only necessary when installing a new component.
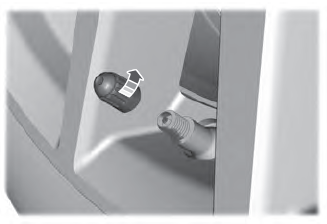
Release the cable tension by turning the release screw until the handle lever releases from the stop.
-
Turn the release screw until the handle lever releases from the stop.
-
Release the handle lever from the stop.
-
Turn the release screw until the handle lever releases from the stop.
.jpg) |
-
NOTE: This step is only necessary when installing a new component.
Remove the exterior rear door handle reinforcement.
-
Detach the cable from the exterior rear door handle reinforcement.
-
Remove the cable eyelet from the lever.
-
Press the locking tab down
-
Slide the exterior front door handle reinforcement forward.
-
Remove the exterior front door handle reinforcement.
-
Detach the cable from the exterior rear door handle reinforcement.
.jpg) |
Installation
-
To install, reverse the removal procedure.
-
NOTE: This step is only necessary when installing a new component.
NOTE: This step must be done correctly or the exterior door handle will not engage the lever on installation.
Position the exterior rear door handle reinforcement in the service position.
-
While keeping tension on the cable and holding the handle lever in the engaged position against the stop.
-
Turn the release screw until the handle lever is positioned against the stop.
-
While keeping tension on the cable and holding the handle lever in the engaged position against the stop.
.jpg) |
-
Carry out the power door window initialization.
Refer to: Power Door Window Initialization (501-11 Glass, Frames and Mechanisms, General Procedures).
 Removal and Installation - Exterior Rear Door Handle
Removal
NOTE:
LH (left-hand) side shown, RH (right-hand) side similar.
NOTE:
Removal steps in this procedure may contain installation details.
Remove the rear door window regulator and motor...
 Removal and Installation - Front Door Latch
Removal
NOTE:
LH (left-hand) side shown, RH (right-hand) side similar.
NOTE:
Removal steps in this procedure may contain installation details.
Remove the front door window regulator and motor...
Other information:
Lincoln Corsair 2020-2024 Owners Manual: General Information on Radio Frequencies
This device complies with Part 15 of the FCC Rules and with Industry Canada license-exempt RSS standard(s). Operation is subject to the following two conditions: (1) This device may not cause harmful interference, and (2) This device must accept any interference received, including interference that may cause undesired operation...
Lincoln Corsair 2020-2024 Service Manual: Removal and Installation - Inverter System Controller [SOBDMC]
Special Tool(s) / General Equipment 307-805Alignment Pins (2) Ford Diagnostic Equipment Materials Name Specification Engine Oil - SAE 0W-20 - Synthetic Blend Motor OilXO-0W20-Q1SP WSS-M2C947-B1 Removal NOTICE: Be sure to keep all fluid and debris away from any open ISC (inverter system controller) connections, or disassembled/ open transmission compone..
Categories
- Manuals Home
- 1st Generation Lincoln Corsair Owners Manual
- 1st Generation Lincoln Corsair Service Manual
- Capacities and Specifications - 2.0L
- Interior Lamps
- Warning Lamps and Indicators
- New on site
- Most important about car
Second Stage: Checking Tire Pressure
WARNING: If the tire does not inflate to the recommended tire pressure within 15 minutes, stop and call roadside assistance.
WARNING: The power plug may get hot after use and should be handled carefully when unplugging.
Check the air pressure of your tires as follows:
Copyright © 2024 www.licorsair.com