Lincoln Corsair: Handles, Locks, Latches and Entry Systems / Removal and Installation - Exterior Front Door Handle
Removal
NOTE: LH (left-hand) side shown, RH (right-hand) side similar.
NOTE: Removal steps in this procedure may contain installation details.
-
Remove the front door window regulator and motor.
Refer to: Front Door Window Regulator and Motor (501-11 Glass, Frames and Mechanisms, Removal and Installation).
-
NOTE: The front door is shown transparent for clarity.
Disconnect the exterior front door handle electrical connector.
.jpg) |
-
Remove the exterior front door handle access plug.
.jpg) |
-
Remove the exterior front door handle.
-
Hold the exterior front door handle open.
-
Turn the release screw enough to release the
exterior front door handle and remove the exterior front door handle.
Torque: 36 lb.in (4.1 Nm)
-
Hold the exterior front door handle open.
.jpg) |
Passenger side
-
Remove the exterior front door handle plug.
-
Turn the release screw enough to release the exterior front door handle plug.
-
Remove the exterior front door handle plug.
-
Turn the release screw enough to release the exterior front door handle plug.
.jpg) |
-
Remove the exterior front door handle plug gasket.
.jpg) |
Installation
-
NOTE: Transfer parts as necessary.
To install, reverse the removal procedure.
-
NOTE: This step is only necessary when installing a new component.
Using the diagnostic scan tool, carry out the remote function actuator (RFA) module self test.
-
Carry out the power door window initialization.
Refer to: Power Door Window Initialization (501-11 Glass, Frames and Mechanisms, General Procedures).
 Removal and Installation - Door Lock Cylinder
Removal
NOTE:
LH (left-hand) side shown, RH (right-hand) side similar.
NOTE:
Repair individual door lock cylinders by discarding the
inoperative door lock cylinder and building a new door lock cylinder
using the appropriate lock repair service kit...
 Removal and Installation - Exterior Front Door Handle Reinforcement
Removal
NOTE:
LH (left-hand) side shown, RH (right-hand) side similar.
Remove the front door latch.
Refer to: Front Door Latch (501-14 Handles, Locks, Latches and Entry Systems, Removal and Installation)...
Other information:
Lincoln Corsair 2020-2024 Service Manual: Removal and Installation - Tire Pressure Monitoring System (TPMS) Sensor
Removal WARNING: The Tire Pressure Monitoring System (TPMS) sensor battery may release hazardous chemicals if exposed to extreme mechanical damage. If these chemicals contact the skin or eyes, flush immediately with water for a minimum of 15 minutes and get prompt medical attention...
Lincoln Corsair 2020-2024 Service Manual: Removal and Installation - Wheel and Tire
Materials Name Specification Motorcraft® High Temperature Nickel Anti-Seize LubricantXL-2 - Removal With the vehicle in NEUTRAL, position it on a hoist. Refer to: Jacking and Lifting (100-02 Jacking and Lifting) . NOTICE: Do not use heat to loosen a seized wheel nut or damage to the wheel and wheel bearing can occur...
Categories
- Manuals Home
- 1st Generation Lincoln Corsair Owners Manual
- 1st Generation Lincoln Corsair Service Manual
- Normal Scheduled Maintenance
- Child Safety Locks
- Remote Start Settings
- New on site
- Most important about car
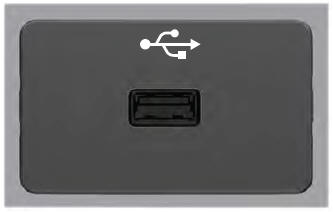
USB Port
WARNING: Driving while distracted can result in loss of vehicle control, crash and injury. We strongly recommend that you use extreme caution when using any device that may take your focus off the road. Your primary responsibility is the safe operation of your vehicle. We recommend against the use of any hand-held device while driving and encourage the use of voice-operated systems when possible. Make sure you are aware of all applicable local laws that may affect the use of electronic devices while driving.
USB A

